A beginner-safe list of core moves you can do in a small space, plus warm-up tips, modifications, common mistakes, and easy routines to start today.
Home Pulse Fit
•
home workouts and fitness
Core Crushing: 10 No-Equipment Ab Moves You Can Do Anywhere
Build a stronger core at home with this crunch-free, no-equipment routine. Ten beginner-friendly moves with form cues, options, warm-up, recovery tips, and simple workout plans.

Marcus Thorne
Marcus Thorne is an NASM-certified personal trainer and the creator behind Home Pulse Fit. After successfully transforming his own health using only bodyweight routines in his small apartment, he left his demanding corporate career to help others do the same. Today, he is dedicated to making fitness accessible, sustainable, and entirely gym-free for busy beginners.
Published
October 18, 2026
Updated
October 18, 2026
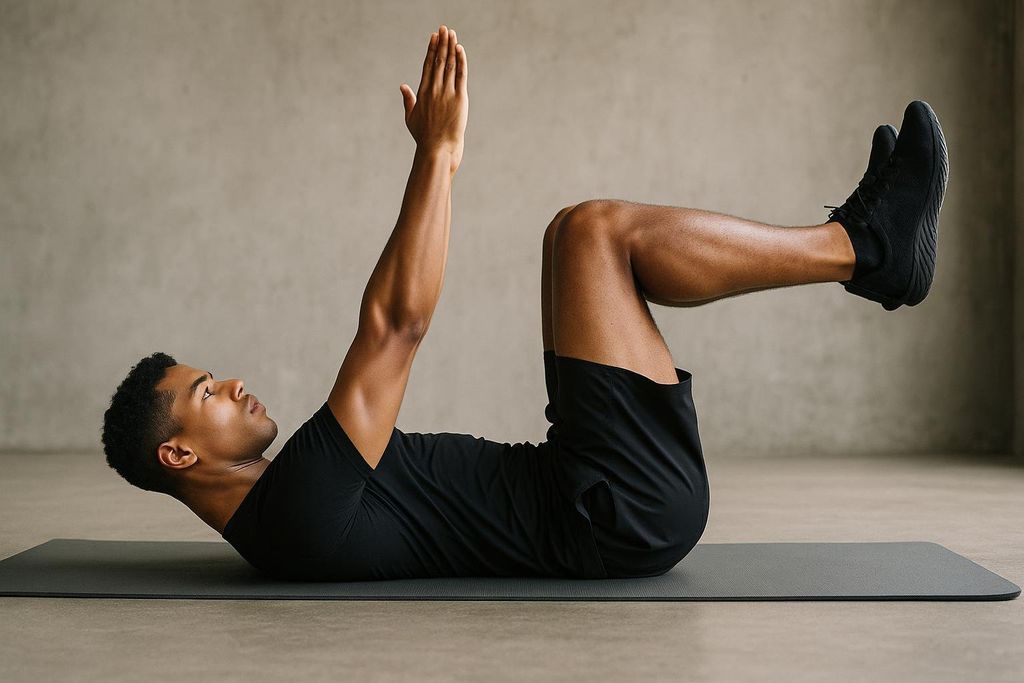
If you have ever been told you need hundreds of crunches for “abs,” let me save you a lot of neck strain and disappointment. Your core is not just the front of your stomach. It is a full support system that helps you move, lift, breathe, and stay steady, whether you are carrying groceries, chasing kids, or sitting at a desk all day.
This is my go-to “core crushing” routine for busy beginners: ten no-equipment, crunch-free moves you can do in a living room, hotel room, or tiny corner of your bedroom. No fancy gear. No complicated choreography. Just clean reps, smart tension, and consistency.
Before you start
Done right, core work feels like:
- Firm tension around your midsection, like you are gently bracing for a cough
- Steady breathing, not breath-holding or face-grimacing
- No pinching in your lower back and no neck strain
Quick form rule I use with clients: ribs down, pelvis neutral, breathe. “Ribs down” is a cue to control rib flare, not to force a hard crunch or jam your spine into flexion. Think of it as keeping your ribcage stacked over your pelvis while you keep breathing.
Quick warm-up (2 minutes)
- Cat-cow: 5 slow reps
- Hip circles: 5 each direction (on hands and knees)
- 90-90 breathing: Lie on your back with knees over hips, take 3 to 5 slow breaths and feel your ribs melt down
What you need
- A soft surface like a mat, rug, or towel
- Optional: a folded towel for knee comfort
- About 10 to 20 minutes
How to use this routine
Pick one of these simple formats:
- Beginner circuit: 30 seconds work, 30 seconds rest, 1 to 2 rounds
- Standard circuit: 40 seconds work, 20 seconds rest, 2 to 3 rounds
- Strength style: 8 to 12 slow reps for rep moves (like dead bug or bird dog), or 20 to 40 second holds for plank moves (like forearm plank or side plank), 2 to 4 sets
You do not need to do all 10 moves every session. Most days, pick 5 to 6 moves: 2 control moves (like dead bug or bird dog), 1 glute and pelvis stability move (like bridge march), then 2 to 3 plank or anti-rotation moves.
Train core 2 to 4 days per week. If you are also doing full-body workouts, slot this at the end or on a separate short day.
Recovery note: Mild core fatigue or next-day soreness is normal when you are new. Sharp pain, tingling, or worsening back pain is not. Take a rest day when you need it, and keep the next session easier if you feel smoked.
Safety note: If you are dealing with back pain, pregnancy or postpartum recovery, hernia concerns, or diastasis recti, get medical clearance and consider individualized coaching before pushing intensity.
The 10 moves
These are ordered to build tension safely: you will start with control moves, then add harder anti-rotation and plank variations.
1) Dead Bug
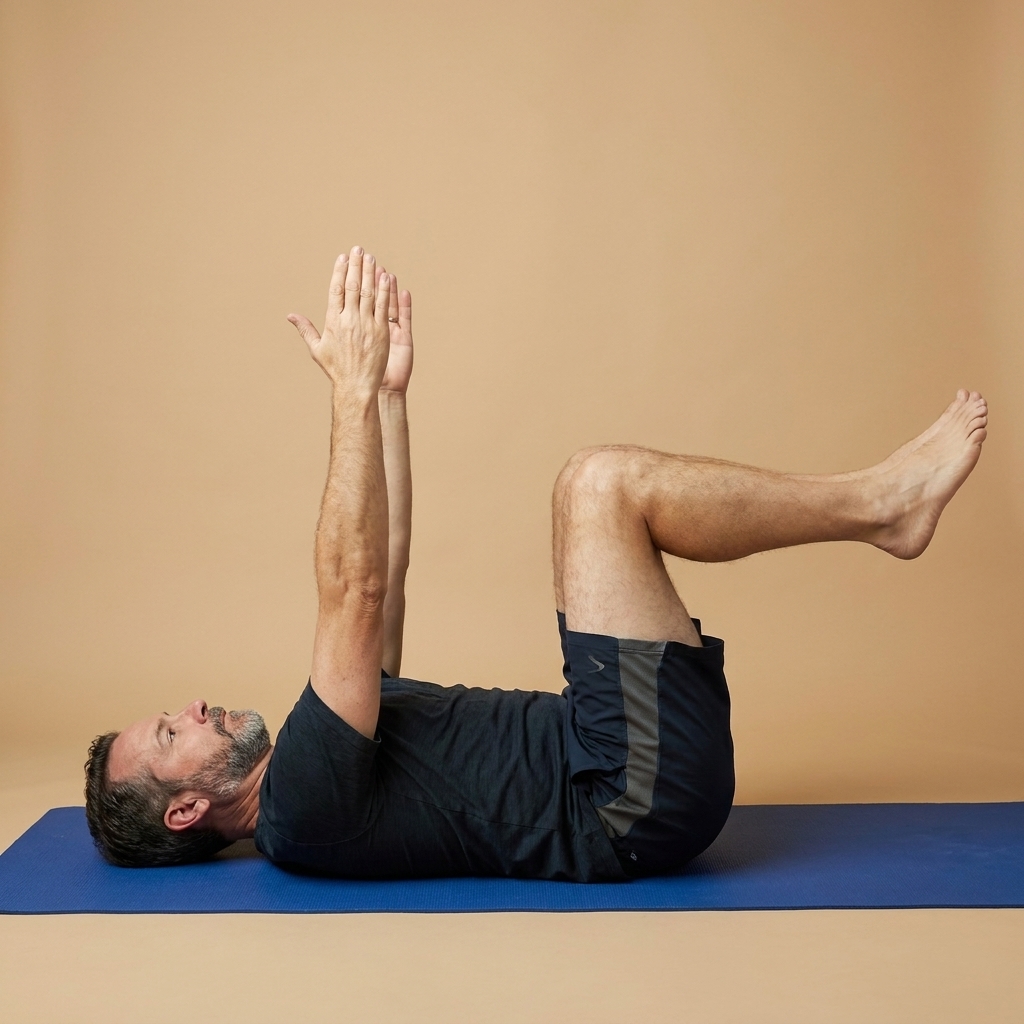
Why it works: Teaches rib control and deep core engagement without stressing your neck.
How to do it:
- Lie on your back. Arms up, knees over hips, shins parallel to the floor.
- Exhale gently and keep your ribs from popping up. Think low back heavy and close to the floor, not jammed flat.
- Slowly extend one leg and the opposite arm. Keep your spine steady and quiet.
- Return and switch sides.
Make it easier: Only move the legs, keep arms still. Shorten the range.
Make it harder: Pause for 2 seconds fully extended, then return slowly.
2) Heel Taps
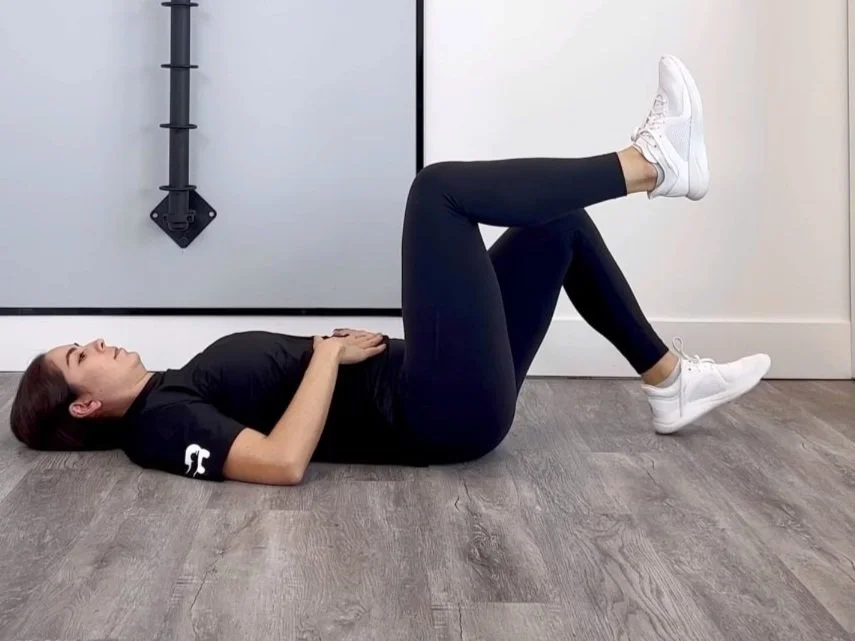
Why it works: Builds lower-ab control and pelvic stability with low-back-friendly mechanics.
- Lie on your back, knees bent over hips.
- Brace lightly and alternate tapping one heel to the floor.
- Keep your low back heavy and steady. If your back arches, shorten the tap.
Easier: Tap closer to your body.
Harder: Reach the tapping leg a little farther out before returning.
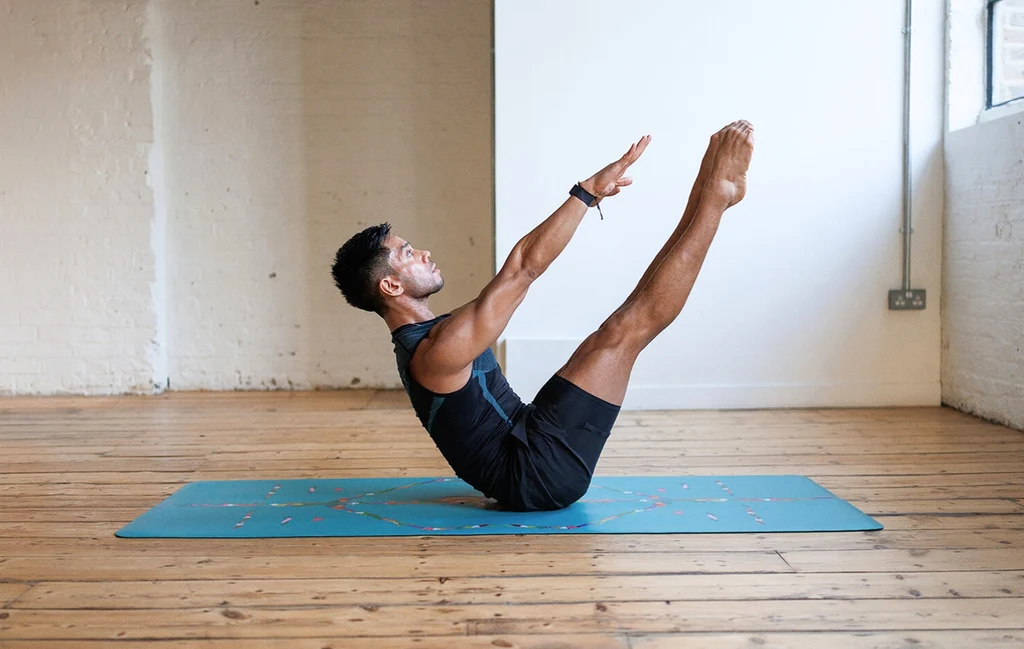
3) Hollow Hold (Tucked)
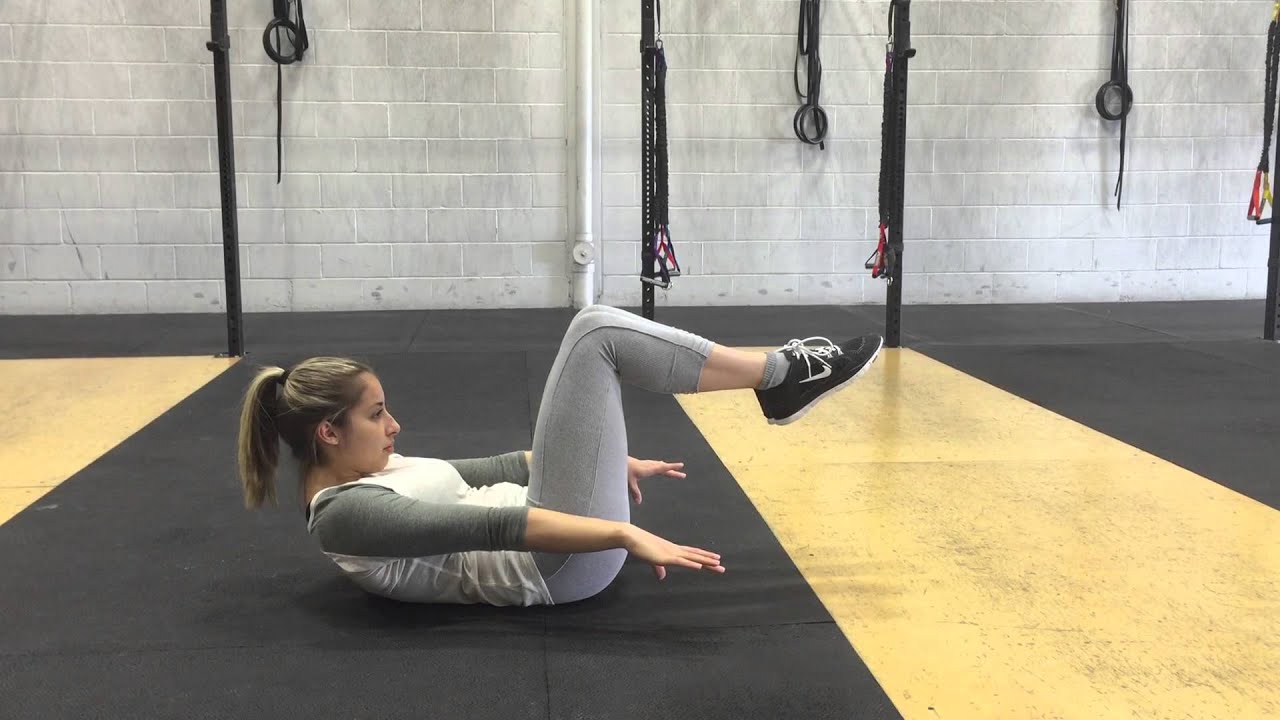
Why it works: Trains full front-line tension and rib and pelvis control. Over time, that can support better posture habits and cleaner planks and pushups.
- Lie on your back. Bring knees toward your chest.
- Reach arms forward and lift shoulders slightly if comfortable.
- Exhale gently and keep ribs stacked over your pelvis.
- Hold 15 to 30 seconds.
Easier: Head stays down.
Harder: Extend one leg at a time while keeping the tuck.
4) Glute Bridge March
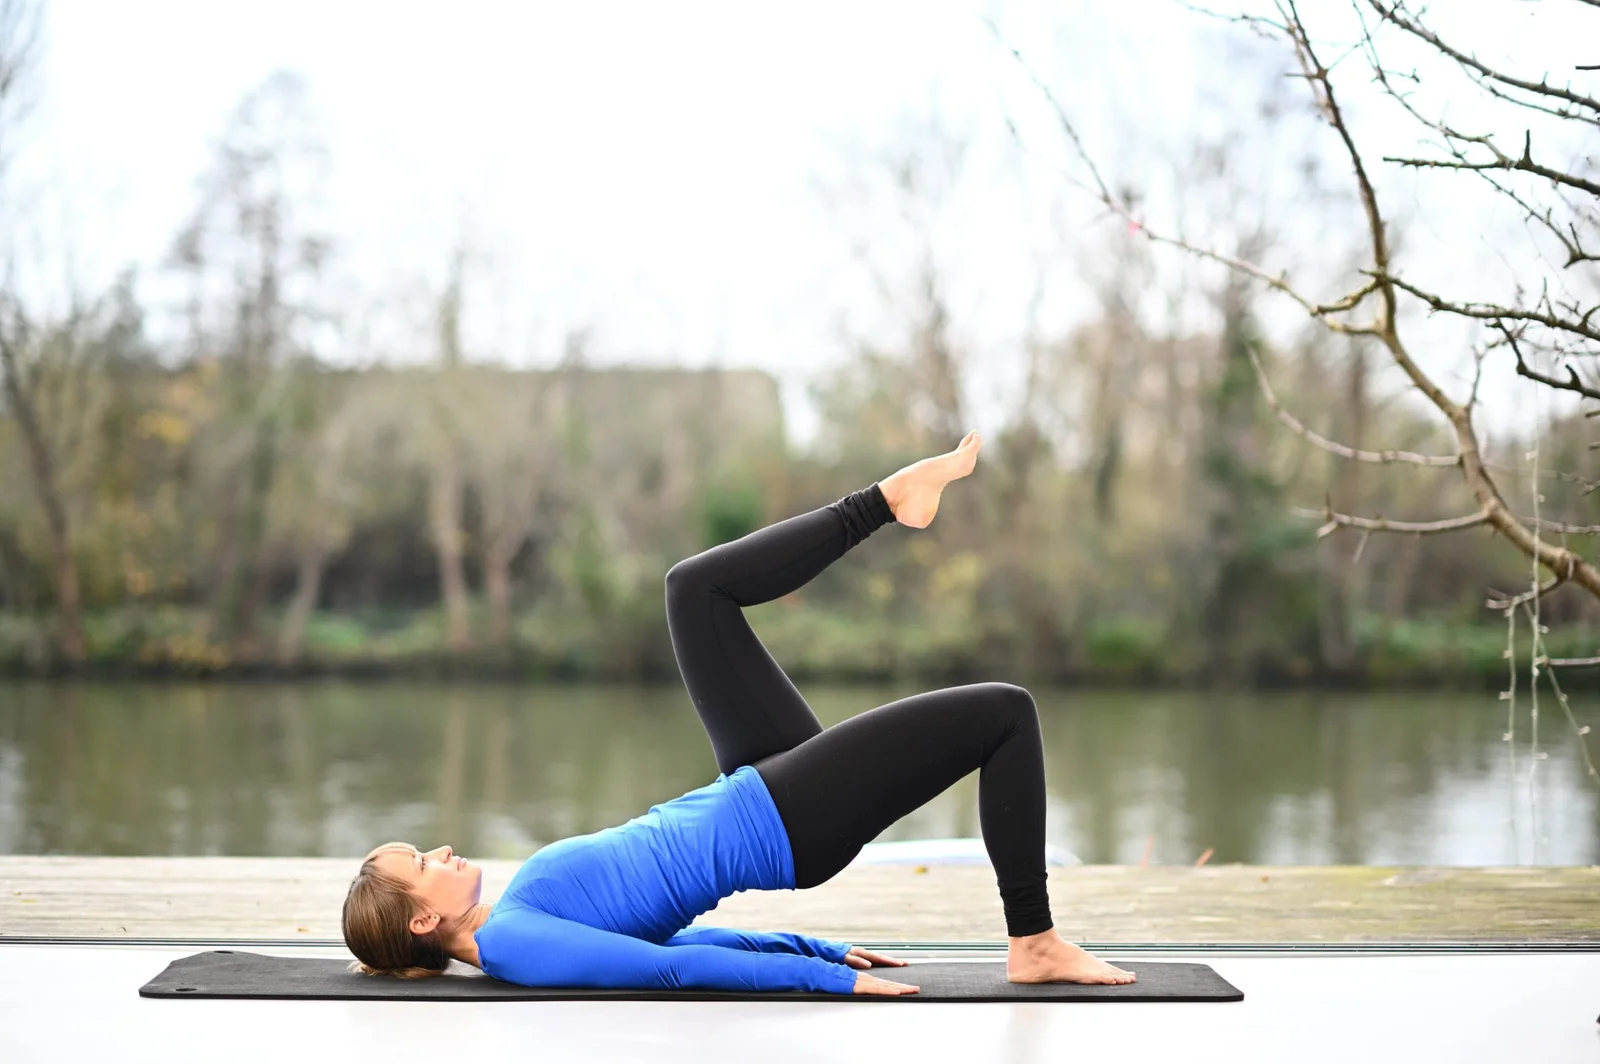
Why it works: Core and glutes work together to stabilize your pelvis, which can reduce stress on the low back during everyday movement.
- Lie on your back, knees bent, feet flat.
- Lift hips into a bridge and hold steady.
- Slowly lift one knee a few inches as if marching.
- Place it down softly and switch sides.
Coach cue: Imagine balancing a glass of water on your hips. No wobbling.
5) Bird Dog
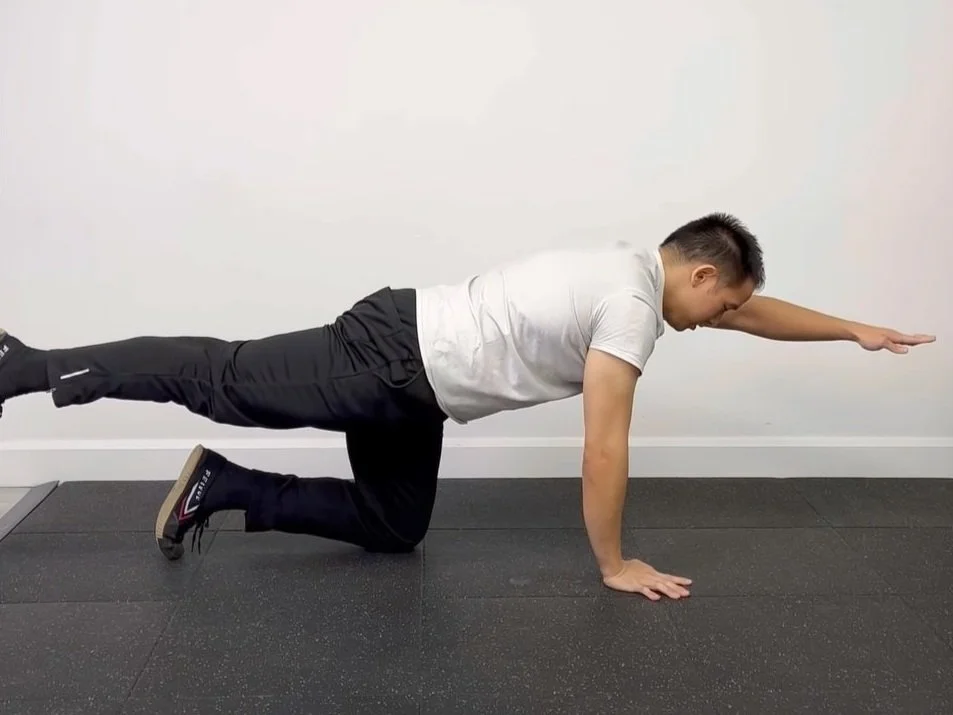
Why it works: Teaches total-body stiffness and control, great for beginners and desk-sore backs.
- Start on hands and knees. Hands under shoulders, knees under hips.
- Brace lightly, then extend opposite arm and leg.
- Keep hips square to the floor. Pause 1 to 2 seconds.
- Return and switch.
Easier: Only extend the leg, keep hands down.
Harder: Add a slow “elbow to knee” crunch under your body, then re-extend.
Before the plank series: Moves 6 to 10 are more demanding. If your back starts sagging, your shoulders shrug up, or your breathing turns into a gritted-teeth contest, regress. Use knees, switch to forearms, or elevate your hands on a sturdy couch or bench.
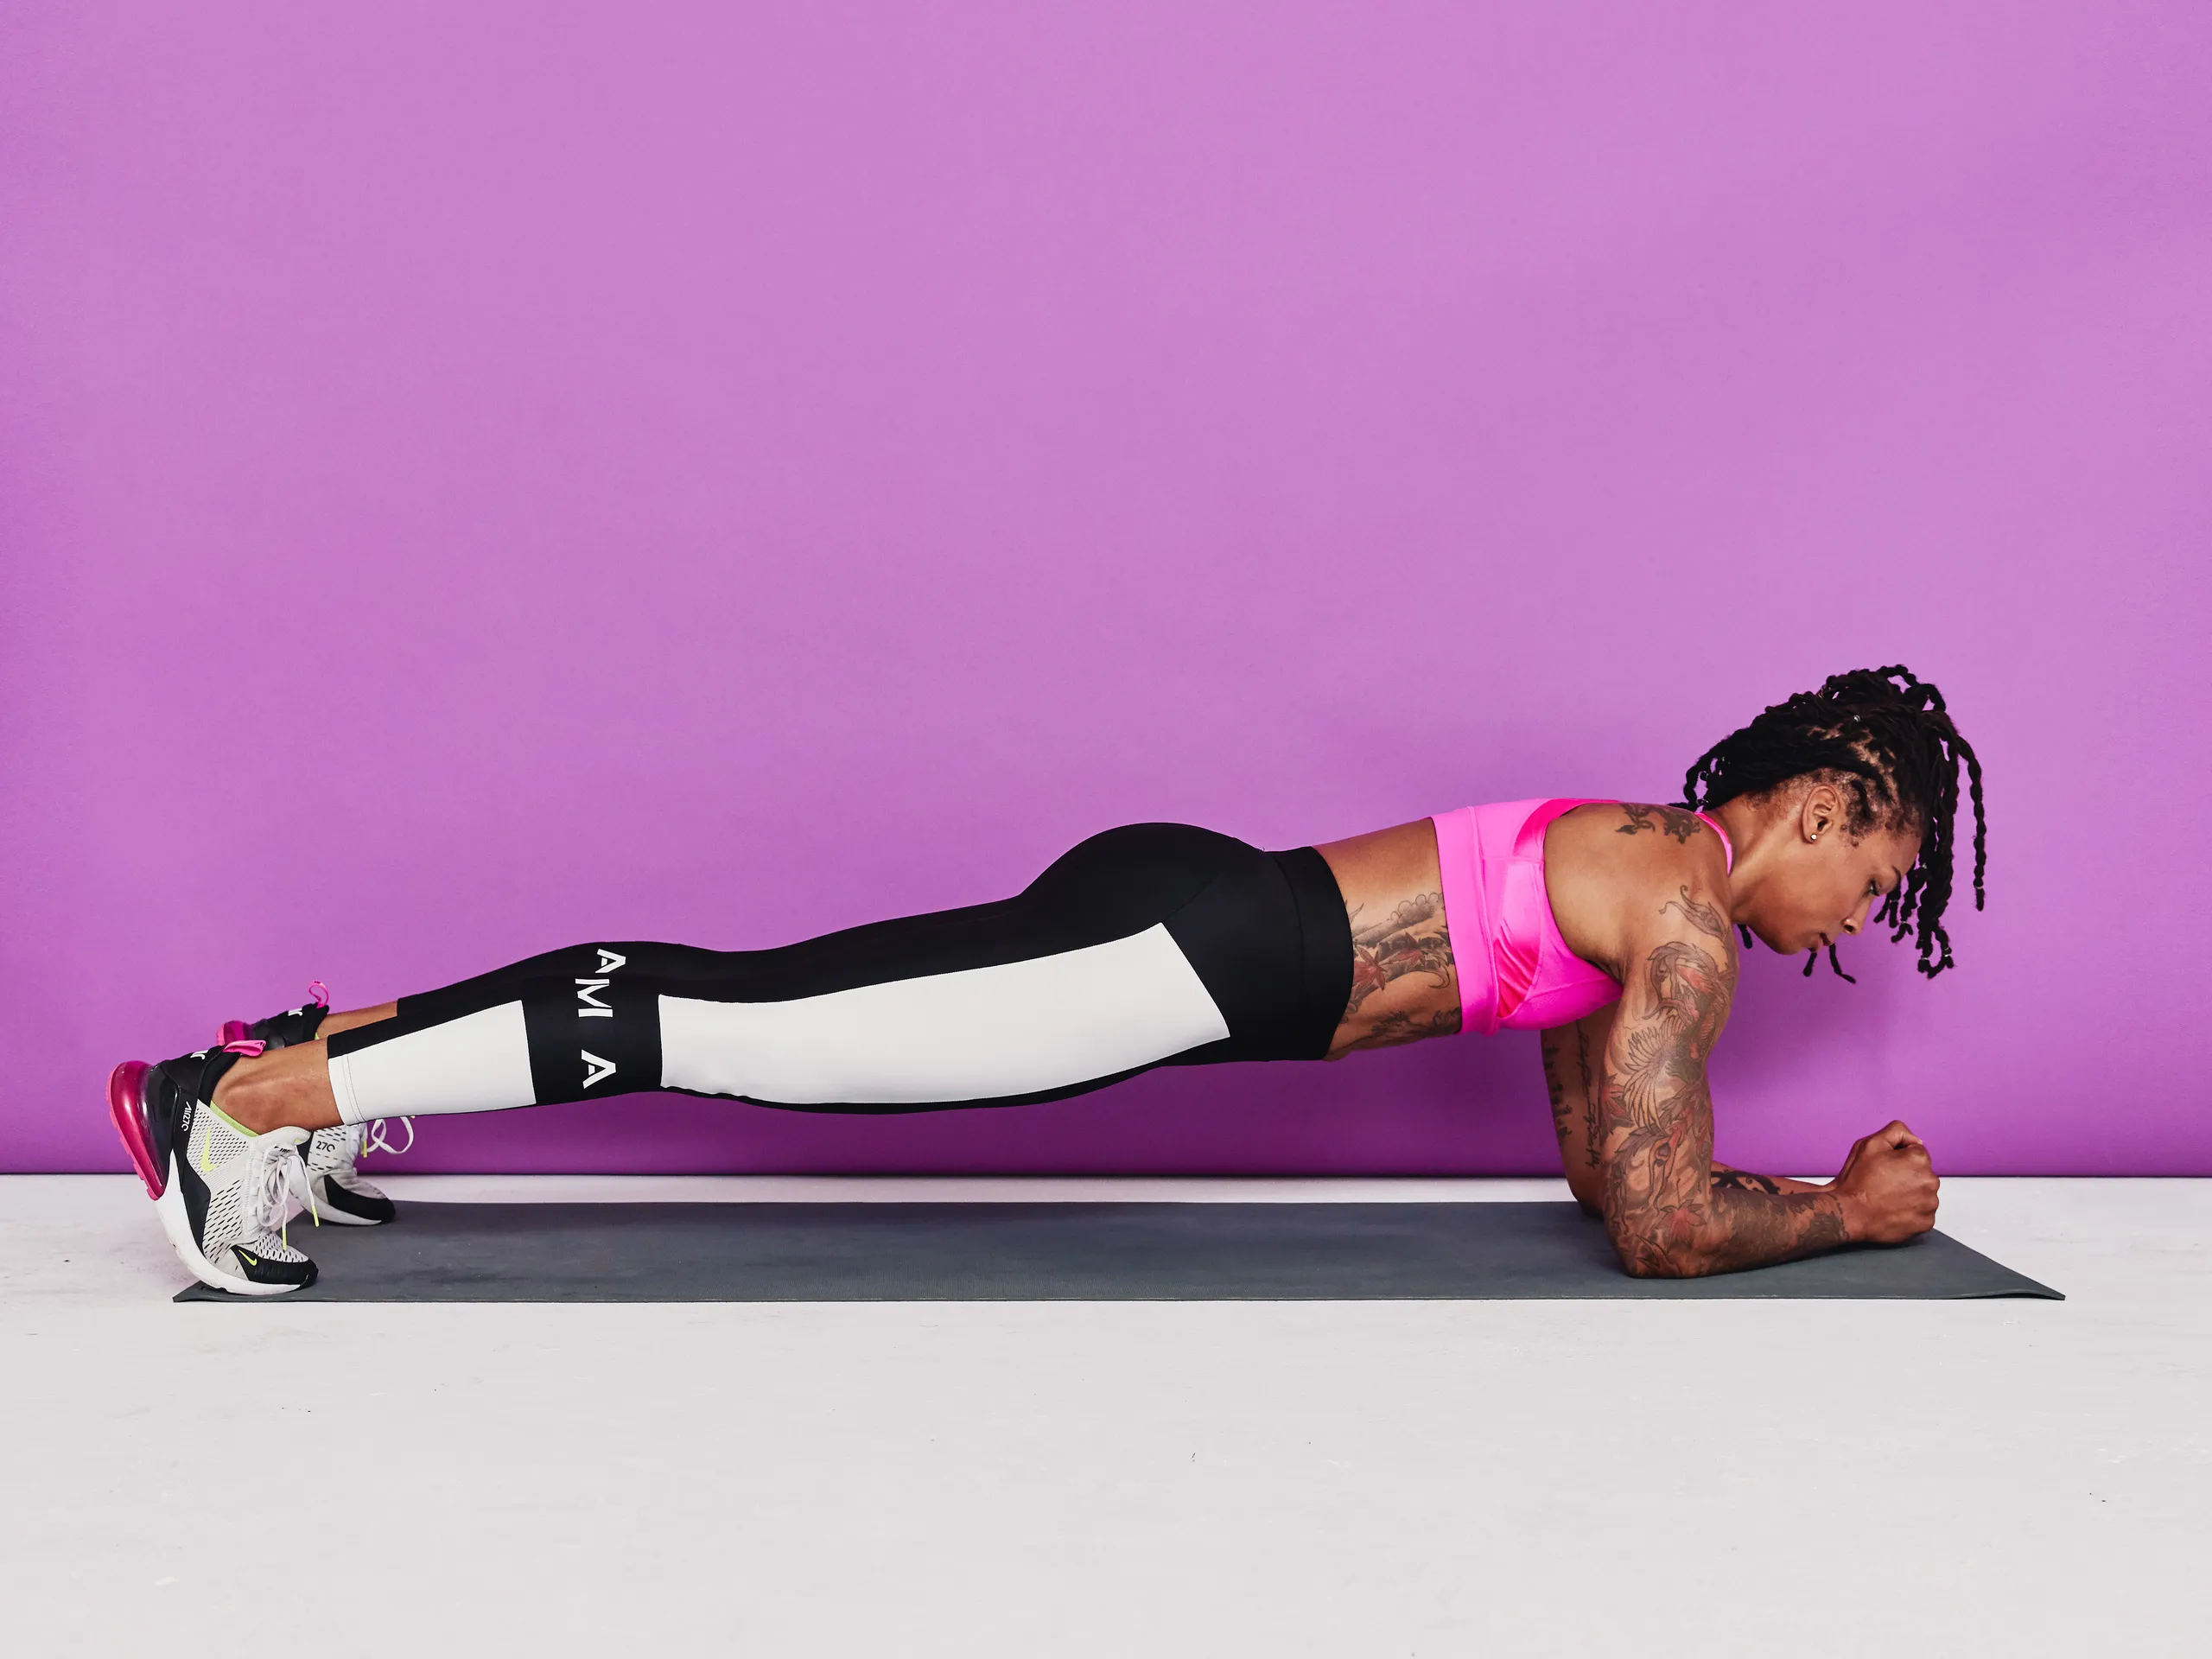
6) Forearm Plank
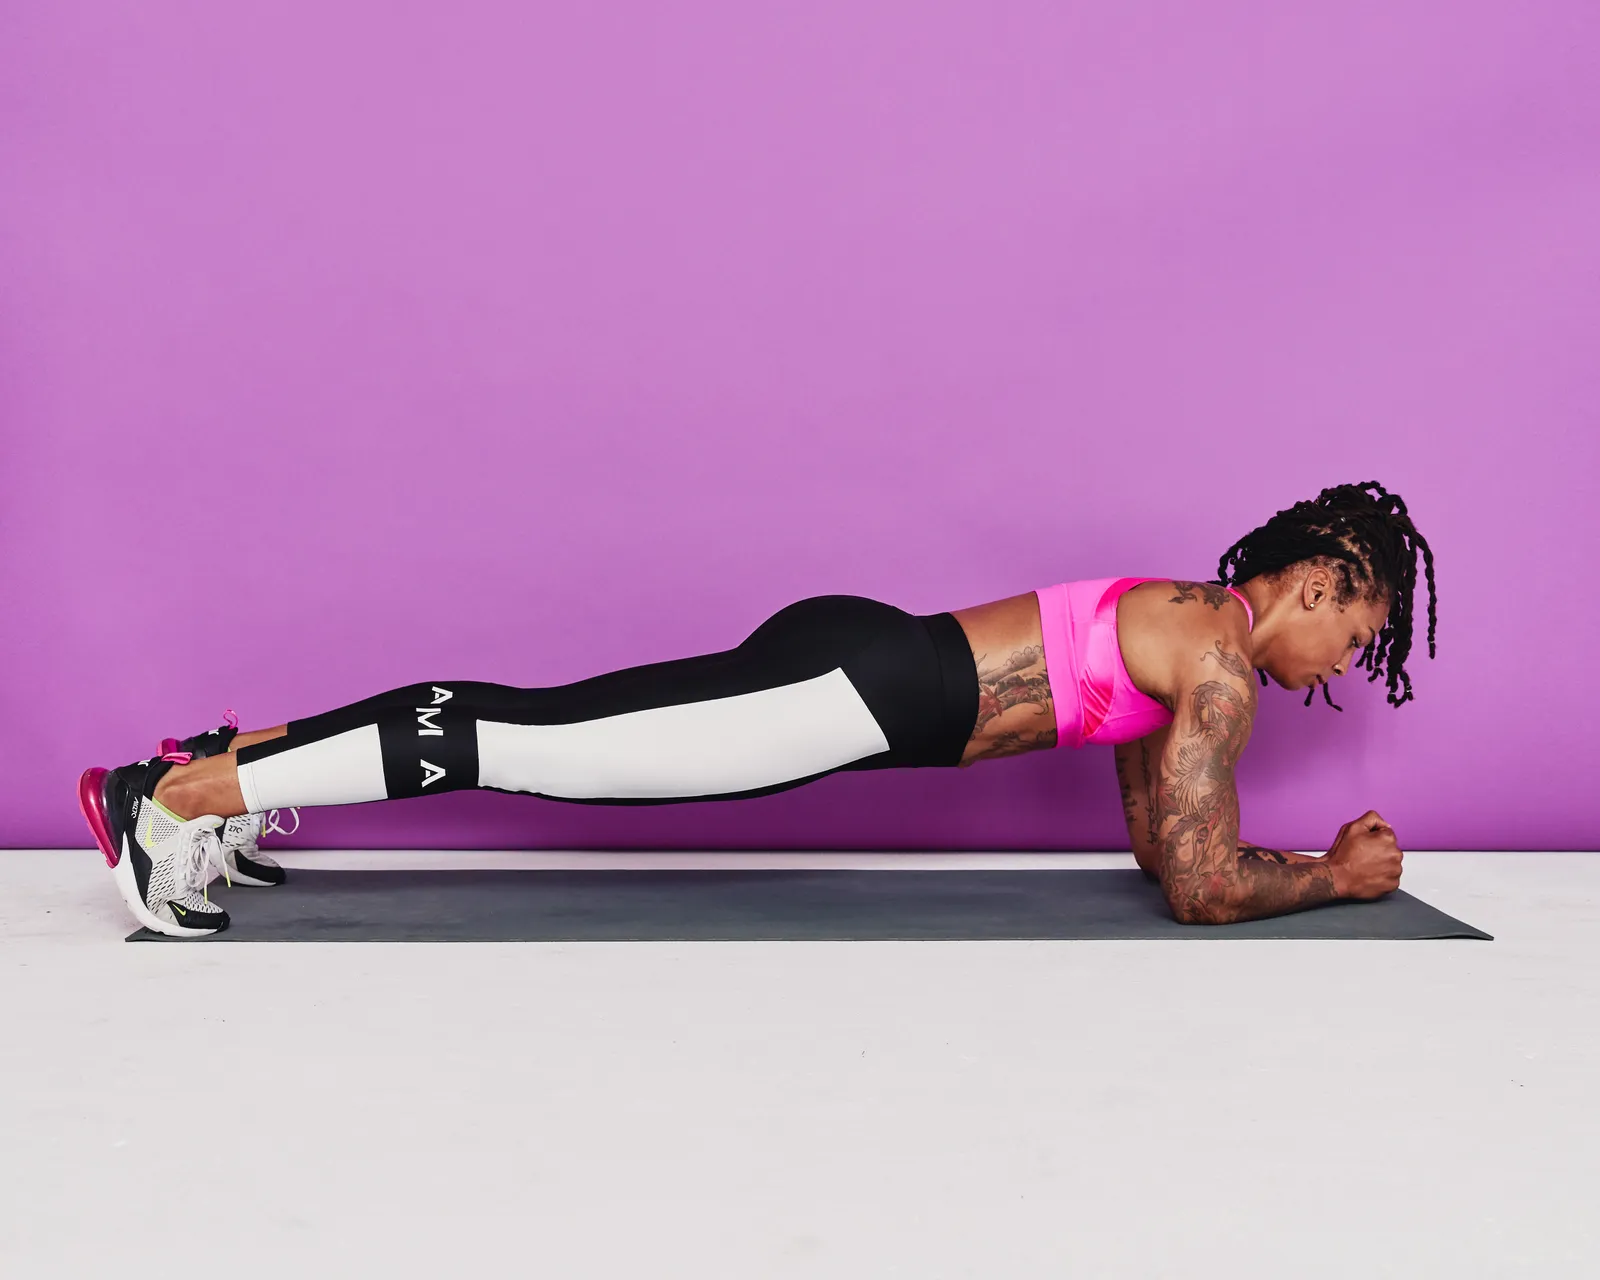
Why it works: A classic for a reason. It trains your core to resist extension, meaning it helps you control that low-back arch.
- Elbows under shoulders, forearms parallel.
- Squeeze glutes and aim for a long line from head to heels.
- If you feel your low back arching, exhale and gently bring your belt buckle slightly toward your ribs, just enough to get back to neutral.
- Push the floor away and keep your ribcage stacked.
- Hold 20 to 45 seconds with steady breathing.
Easier: Drop knees and hold a knee plank.
Harder: Reach one arm forward for 2 seconds, alternate.
7) Side Plank
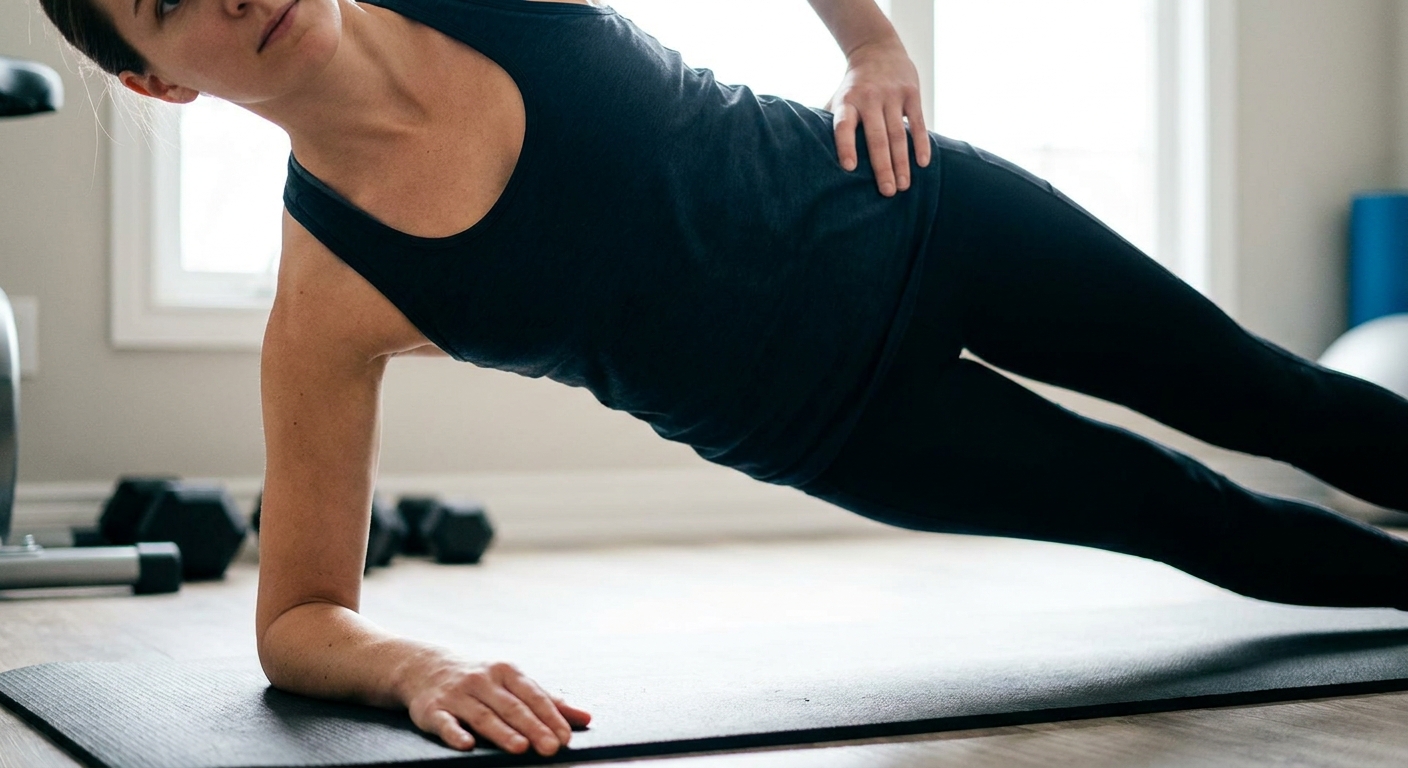
Why it works: Hits the obliques and lateral hip muscles that keep you stable when you walk, run, or carry things on one side.
- Lie on your side, forearm under shoulder.
- Lift hips so your body makes a straight line.
- Hold 15 to 40 seconds, then switch.
Easier: Bottom knee on the floor.
Harder: Full side plank with feet stacked, or add slow top-leg lifts.
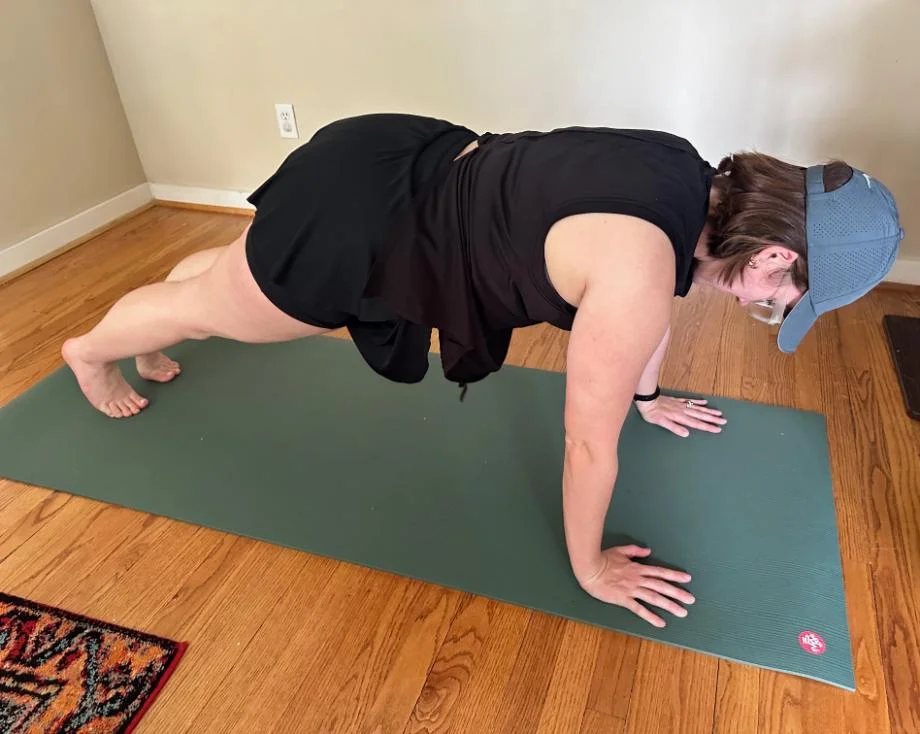
8) Bear Plank (Hover Hold)
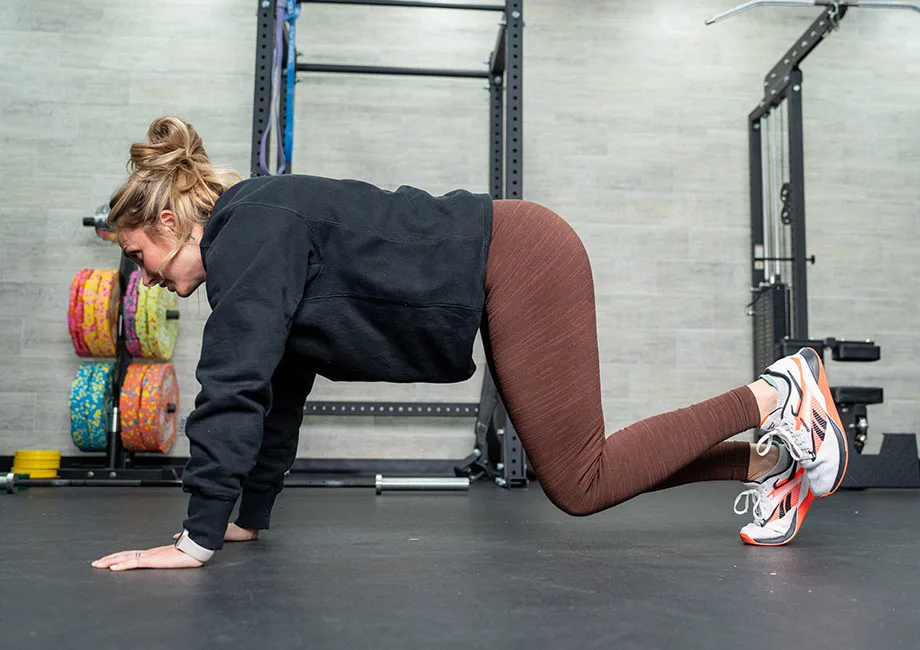
Why it works: Lights up the deep core fast and teaches strong shoulder stability without any equipment.
- Start on hands and knees.
- Tuck toes and hover knees 1 to 2 inches off the floor.
- Keep back flat and breathe quietly.
- Hold 15 to 30 seconds.
Easier: Hold for shorter bursts like 10 seconds.
Harder: Take slow bear steps forward and back for 4 to 8 total steps.
9) Plank Shoulder Taps
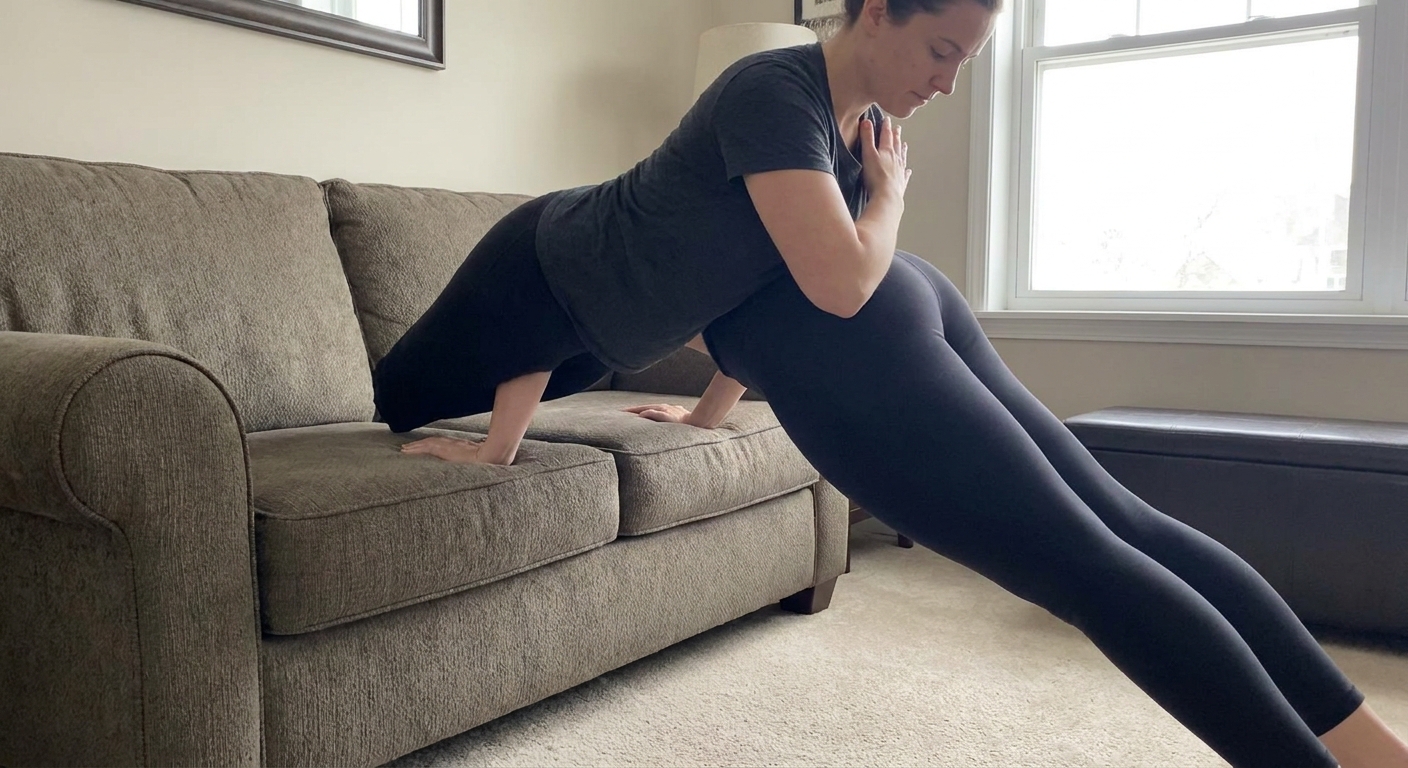
Why it works: Anti-rotation training. Your core learns to stop twisting when you shift weight.
- Start in a high plank, hands under shoulders.
- Feet slightly wider than hip-width for stability.
- Tap one shoulder, set the hand down softly, then switch.
Make it cleaner: Move slower. If hips sway, widen the feet more.
Wrist-friendly option: Do this as an incline plank with hands on a sturdy couch seat or bench.
10) Slow Mountain Climbers
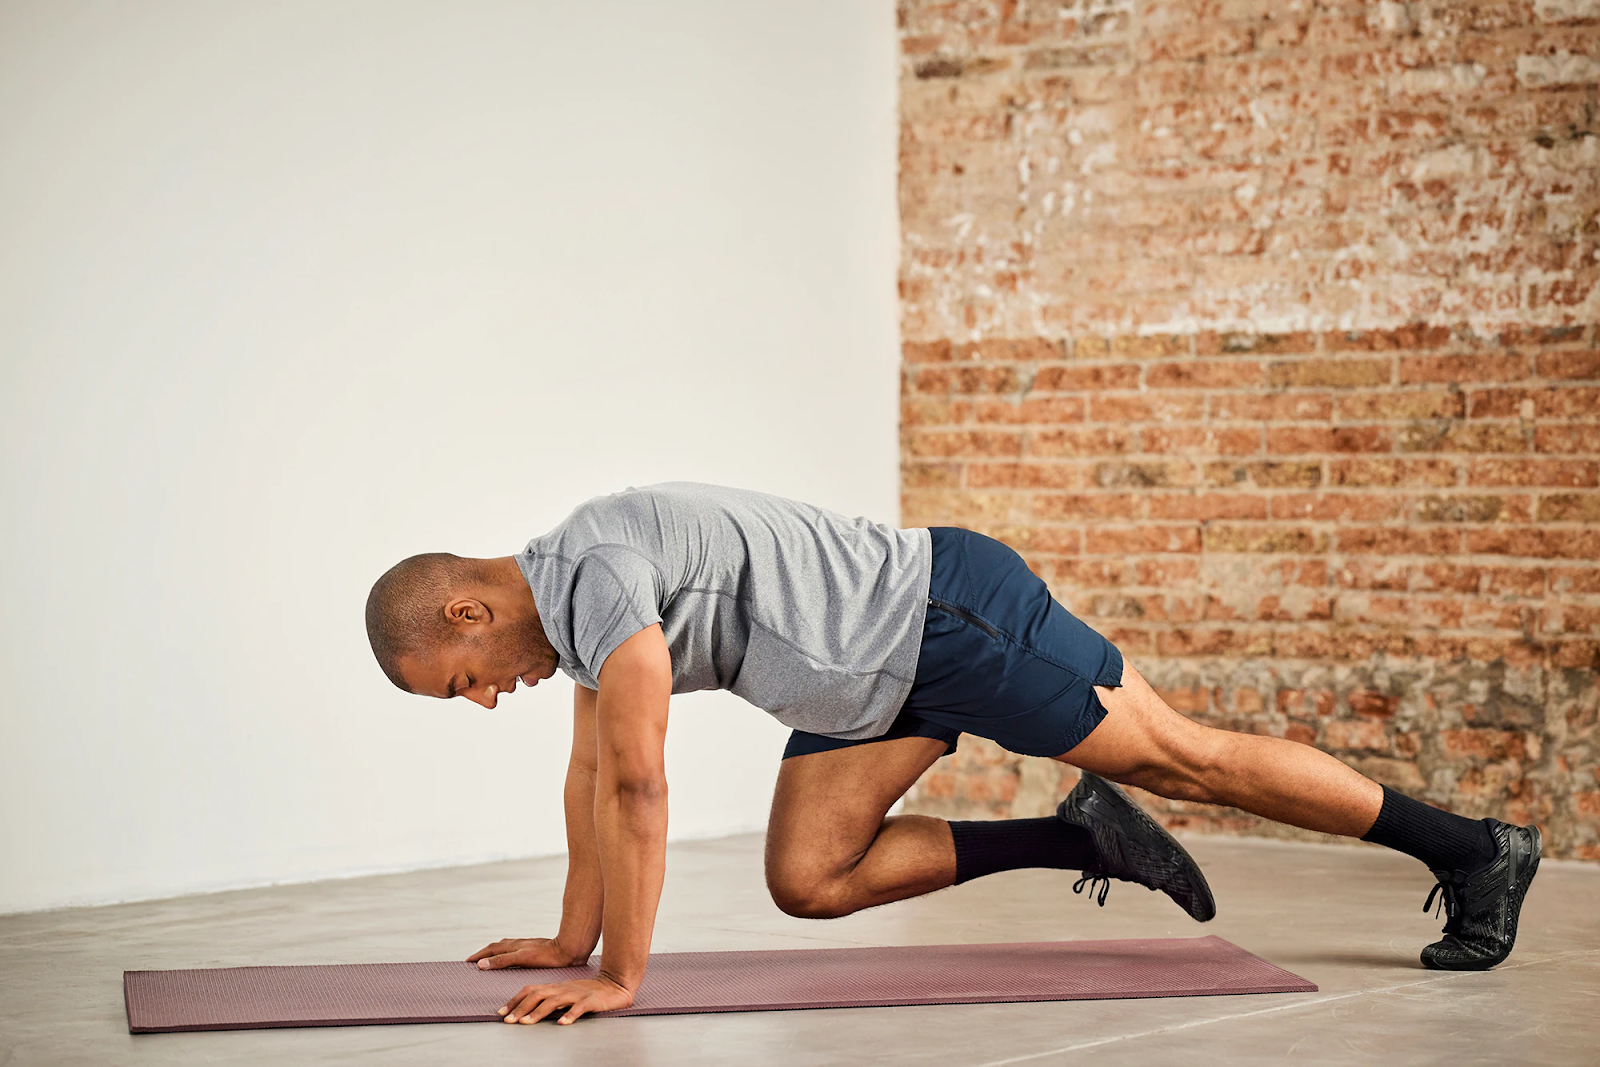
Why it works: Core control plus hip flexor strength, with a little heart-rate bump if you keep it moving.
- Start in a strong high plank.
- Bring one knee toward your chest slowly.
- Return it back with control and switch sides.
Beginner tip: Think “quiet feet.” No stomping.
Wrist-friendly option: Use an incline (hands on a couch seat) or swap in a forearm plank hold.
Two workouts
Workout A (10 to 12 minutes)
- Dead Bug: 30 seconds
- Bird Dog: 30 seconds
- Glute Bridge March: 30 seconds
- Forearm Plank: 20 to 30 seconds
- Side Plank (each side): 20 seconds
Rest 30 to 45 seconds between moves. Do 1 to 2 rounds.
Workout B (15 to 20 minutes)
- Heel Taps: 40 seconds
- Hollow Hold (tucked): 30 seconds
- Bear Plank: 30 seconds
- Plank Shoulder Taps: 40 seconds
- Slow Mountain Climbers: 40 seconds
Rest 20 seconds between moves. Do 2 to 3 rounds.
Common mistakes
- Low back arching: Shorten your range, slow down, exhale, and think ribs stacked and spine steady.
- Neck tension: Skip any move where you feel yourself craning. This routine is crunch-free for a reason.
- Going too fast: Speed hides instability. Clean reps beat sweaty reps for core work.
- Holding your breath: Try an easy pattern: inhale through the nose, exhale through pursed lips during the hardest part.
Progression plan
If you want results you can feel in daily life, pick two core sessions per week and follow this progression:
- Week 1: 1 round, 20 to 30 seconds per move, focus on form
- Week 2: 2 rounds, same times, smoother control
- Week 3: 2 rounds, add 5 to 10 seconds to your holds
- Week 4: 3 rounds or upgrade 1 to 2 moves to a harder variation
My favorite quiet win is adding one extra clean breath to every hold. It sounds small. It compounds fast.
FAQ
Will this routine give me visible abs?
It will make your core stronger and more defined over time, but visible abs depend heavily on overall body fat, daily movement, sleep, and nutrition. Think of this routine as the strength foundation. Pair it with consistent full-body training and sustainable eating habits.
Is it normal to feel this more in my hips than my abs?
A little hip flexor work is normal, especially in moves like mountain climbers. If your hips take over completely, slow down, shorten range, and prioritize dead bugs, heel taps, and planks until your core control catches up.
My wrists hate planks. What can I do?
Use more forearm-based work (forearm plank, side plank on forearm). For high plank moves, elevate your hands on a sturdy couch seat or bench to reduce wrist angle. You can also do bear planks on fists if that feels comfortable.
How long should I hold planks?
Long holds are not required. I would rather see 20 to 40 seconds of perfect tension than 90 seconds of sagging. When form breaks, the set is done.
Your next step
If you are new to core training, do Workout A twice this week. Keep it clean, keep it calm, and stop a rep or two before your form falls apart. That is how you build a core that actually supports your life, not just your ego.
Consistency beats intensity, every time.