Actionable ways to keep challenging your muscles without weights: harder variations, tempo, range of motion, density, and smart tracking for real muscle grow...
Home Pulse Fit
•
home workouts and fitness
5 Glute Bridge Variations Without Weights
Build stronger glutes at home with five progressive, no-weight glute bridge variations. Includes clear setup cues, form fixes, effort targets, and simple routines you can follow.

Marcus Thorne
Marcus Thorne is an NASM-certified personal trainer and the creator behind Home Pulse Fit. After successfully transforming his own health using only bodyweight routines in his small apartment, he left his demanding corporate career to help others do the same. Today, he is dedicated to making fitness accessible, sustainable, and entirely gym-free for busy beginners.
Published
October 18, 2026
Updated
October 18, 2026
If you have ever finished a workout thinking, “My legs worked, but my glutes did not really show up,” you are not alone. Glute bridges are one of my favorite apartment-friendly moves because they are simple, joint-friendly, and seriously effective when you do them with intention.
This guide walks you through five no-weights glute bridge variations you can progress through at home. Start where you are, stay consistent, and let the reps add up.
Quick safety note: You should feel these primarily in your glutes, not sharp pain in your lower back, hips, or knees. If you have a current injury, recent surgery, or you are pregnant or postpartum and unsure about pressure management, get clearance from a clinician or qualified coach. Stop if symptoms spike or form falls apart.
Why glute bridges work
The glute bridge trains hip extension, which is a primary job of the gluteus maximus. Done well, it also teaches your body to use your glutes instead of letting your lower back or hamstrings do all the work. Meanwhile, your glute medius and minimus help with pelvic stability, especially in the marching and single-leg versions.
- Beginner-friendly: easy to learn and scale.
- Low impact: no jumping, no equipment needed.
- Great for sitting-heavy days: helps “wake up” the backside after hours in a chair.
Setup first: the bridge that hits your glutes
Before you jump into variations, nail a clean baseline. Most “I only feel this in my hamstrings” problems come down to setup and range of motion.
Quick setup checklist
- Lie on your back, knees bent, feet flat.
- Feet about hip-width apart, toes pointing mostly forward.
- Heels a comfortable distance from your butt. Close enough that you can drive through your heels, not so close your knees feel jammed.
- Ribs down, chin slightly tucked, eyes toward the ceiling.
- Exhale gently and brace your midsection like you are preparing for a cough.
How to move
- Drive through your heels and lift your hips.
- At the top, think “glutes squeeze, ribs stay down.” Your lower back should not be doing a backbend.
- Lower with control until your hips lightly touch down, then repeat.
Quick warm-up (1 to 2 minutes)
- Pelvic tilts: 6 to 10 slow reps. Exhale, tuck slightly, then relax.
- 90-90 breathing or dead bug breathing: 3 to 5 slow breaths to help you find ribs down and core support.
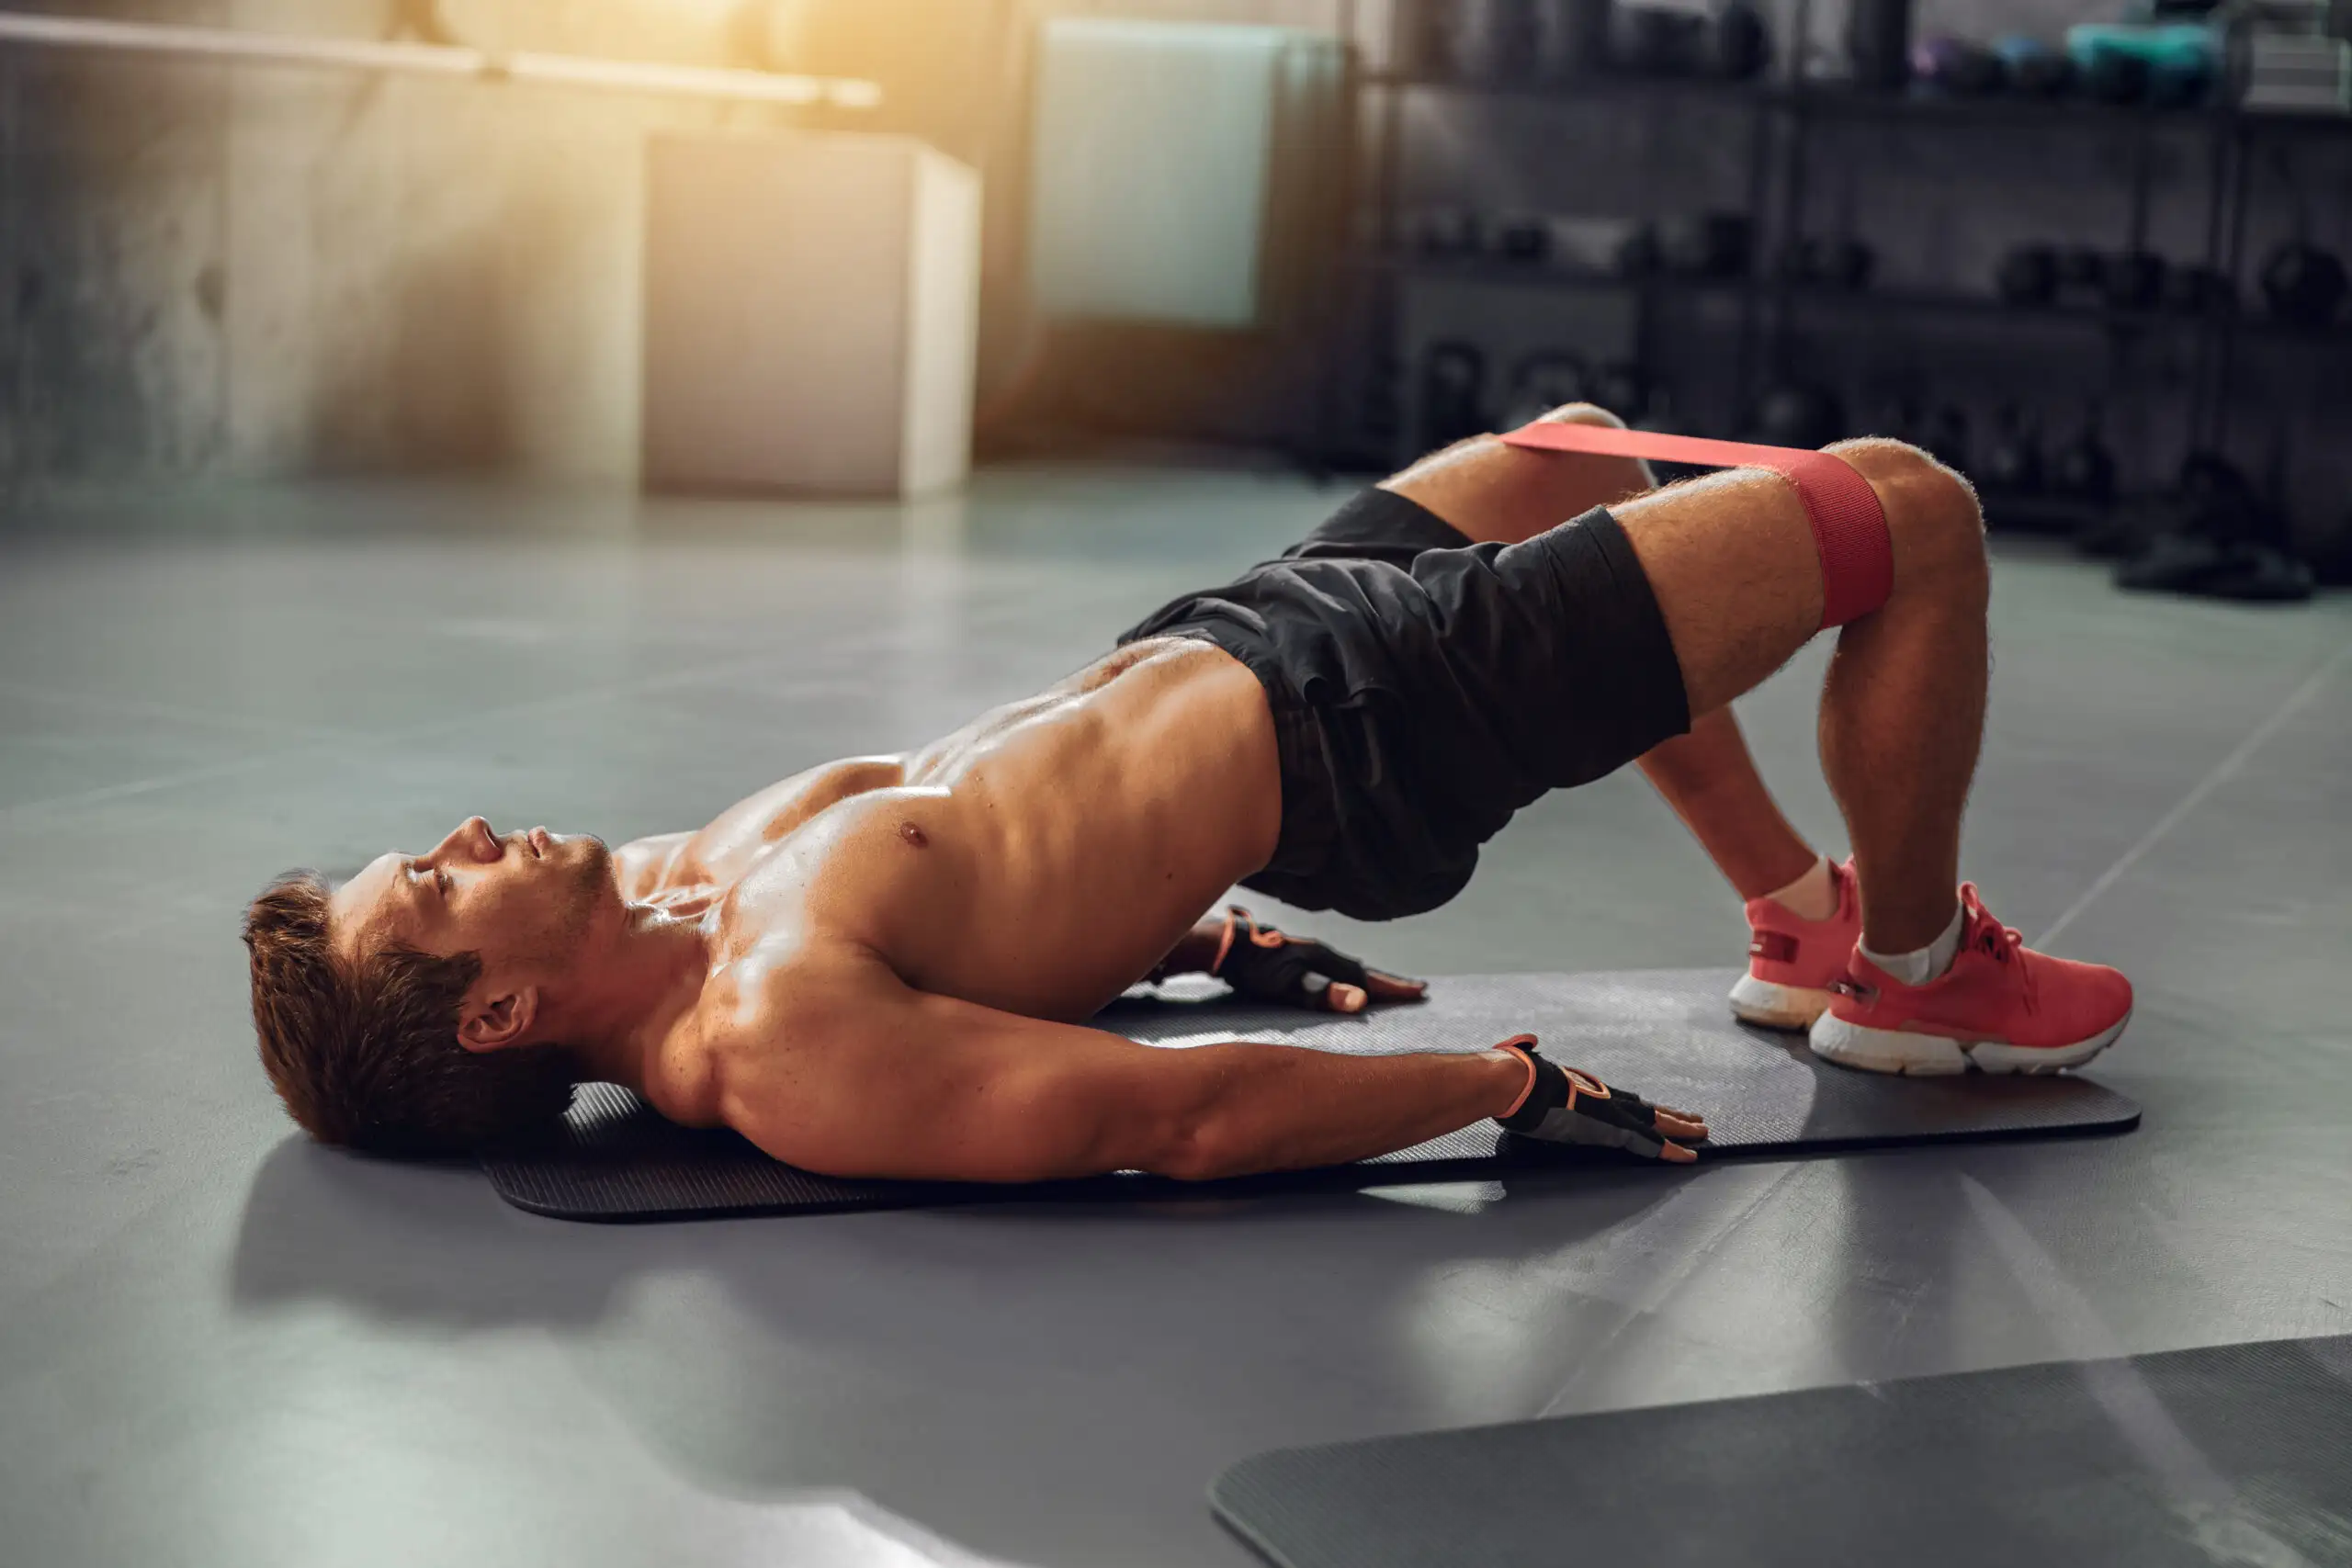
Variation 1: Standard glute bridge
This is your foundation. If you can make the standard version challenging, you are doing it right.
Do it
- Lift hips until your body makes a straight line from shoulders to knees.
- Pause 1 to 2 seconds at the top and squeeze your glutes.
- Lower for 2 seconds.
Best for
- Learning the movement pattern
- Building glute activation and control
- Warm-ups and recovery days
Make it harder without changing the exercise
- Add a longer pause at the top, up to 3 to 5 seconds.
- Slow your lowering phase to 3 to 4 seconds.
- Keep constant tension by stopping just short of resting your hips fully on the floor between reps.
Variation 2: Frog pump
If your hamstrings love to steal the show, frog pumps often help people feel their glutes more. The feet-together position changes your leverage, and many lifters find it makes the glute squeeze easier to lock in.
Setup
- Bring the soles of your feet together.
- Let your knees fall open comfortably like a butterfly stretch.
- Feet stay close to your body.
Do it
- Drive the outer edges of your feet into the floor.
- Lift hips and squeeze glutes hard at the top.
- Use a shorter range of motion if needed. Focus on the squeeze, not height.
Form cues that help
- Exhale, keep ribs down, and think “tuck slightly, then squeeze.”
- If you feel your lower back, shorten the range and make the top position more about glutes than height.
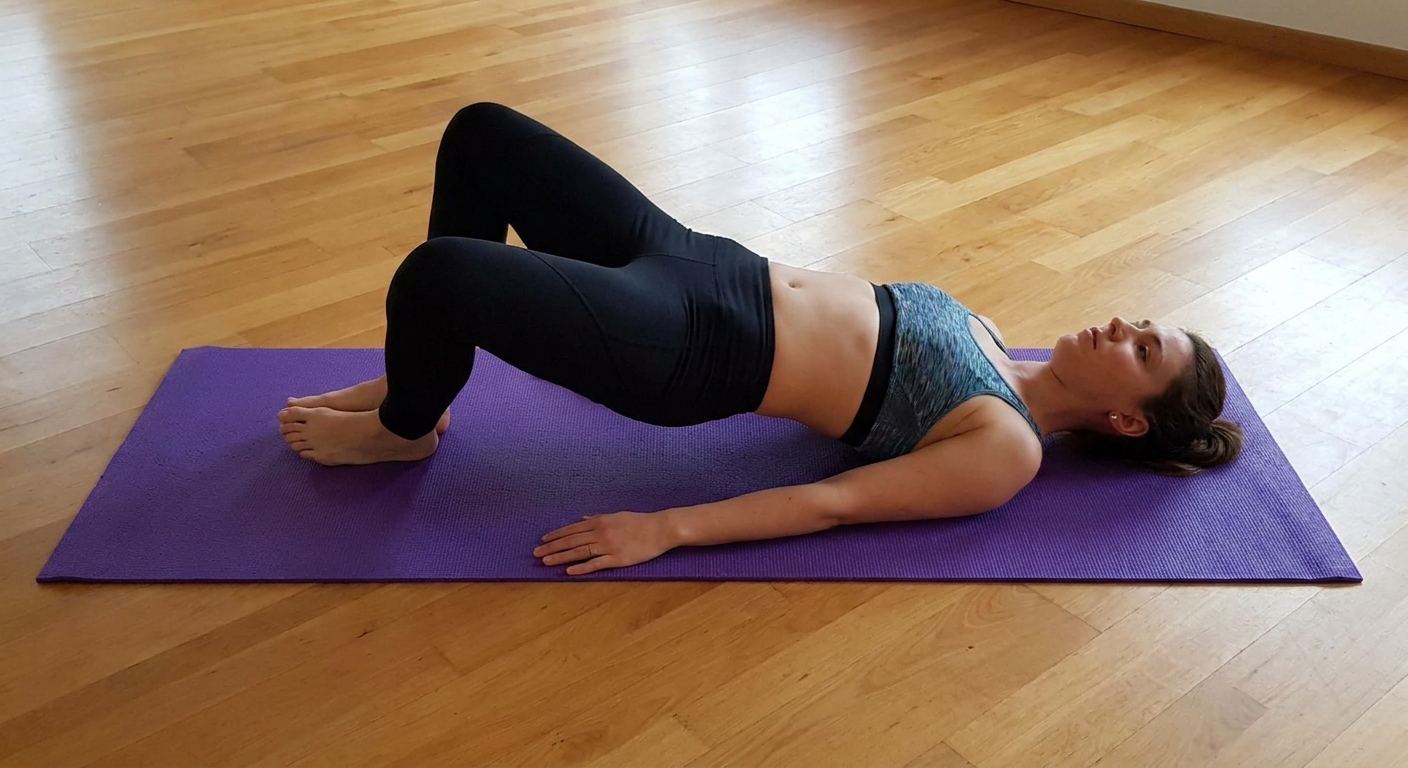
Variation 3: Glute bridge march
This one looks easy until you try to keep your hips level. Marching teaches your glutes and core to stabilize your pelvis, which carries over to walking, stairs, and single-leg exercises.
Do it
- Lift into a strong bridge and hold.
- Keeping hips level, slowly lift one foot a few inches off the floor (knee stays bent).
- Place it back down with control, then switch sides.
Coach tip
Do not rush. If your hips tilt side to side, reduce the height of the march or reset between reps.
Common mistake
Hips dropping as soon as a foot lifts. Fix it by squeezing the standing-side glute harder and shortening the march.
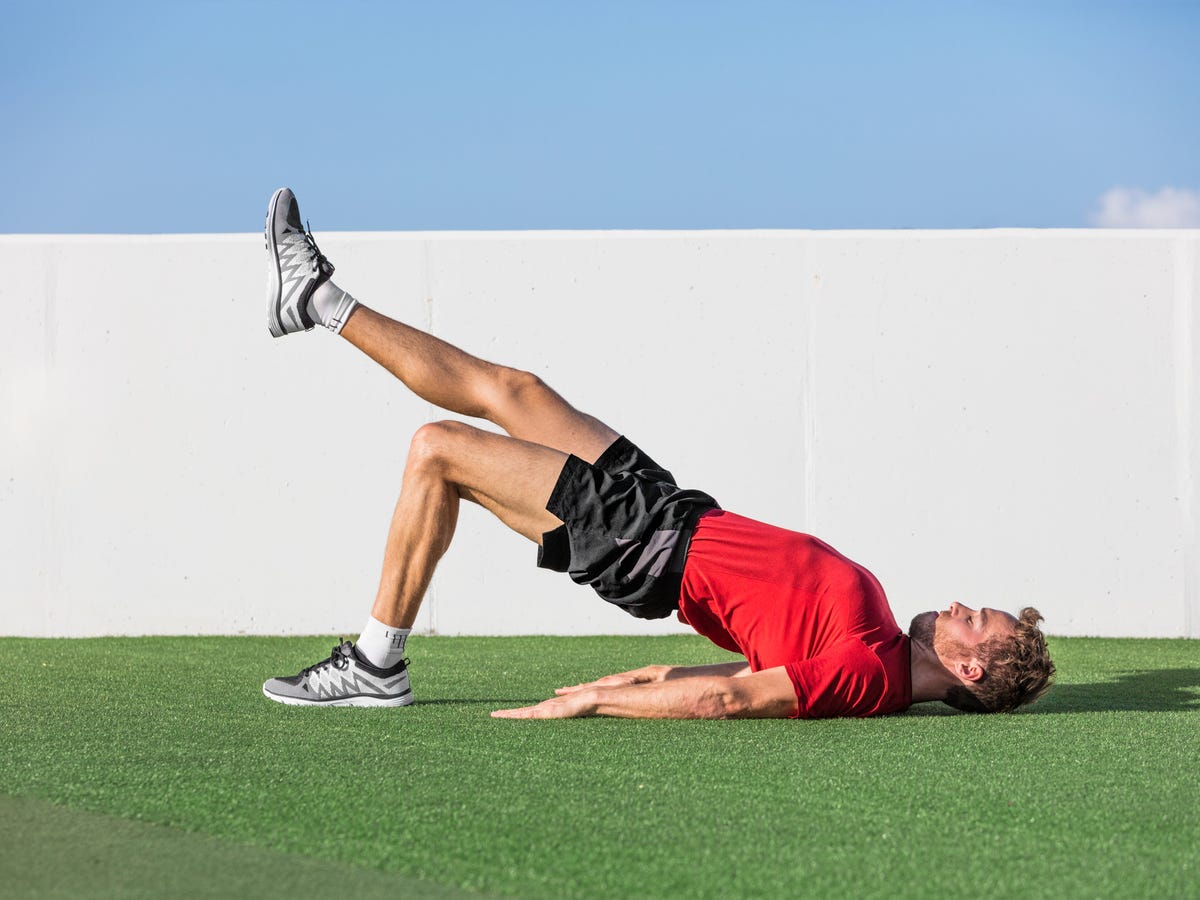
Variation 4: Single-leg glute bridge
If you want a serious challenge with zero equipment, this is it. Single-leg work exposes side-to-side differences and builds strength fast, but only if you keep it controlled.
Setup
- Start in a normal bridge position.
- Extend one leg straight (or keep it bent with the knee above the hip if straight-leg feels too hard).
- Keep thighs parallel, avoid letting the working knee cave inward.
Do it
- Drive through the heel of the planted foot.
- Lift hips while keeping your pelvis level, like headlights pointing straight ahead.
- Pause, then lower slowly.
Scale it
- Easier: keep the lifted leg bent (knee-over-hip style) or reduce range of motion.
- Harder: longer pause at the top, or add 1.5 reps (up, halfway down, up again, then down).
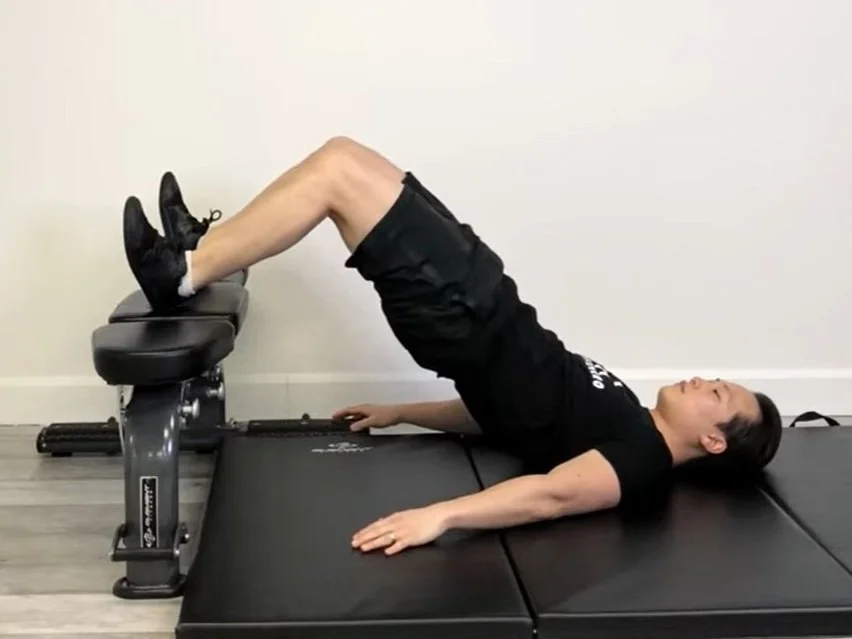
Variation 5: Feet-elevated glute bridge
Elevating your feet changes the joint angles and can increase the challenge without adding weights. For some people, it also increases range of motion. For others, it may feel more hamstring-dominant, so treat this one as a “test and adjust” variation.
Safety first
- Choose a surface that will not slide. If needed, place it on a rug or against a wall.
- Keep your shoulders and upper back on the floor, not on a slippery surface.
Do it
- Place both heels on the elevated surface, toes up if comfortable.
- Bridge up by driving through heels.
- Stop at a strong top position where glutes are working and ribs stay down.
If it turns into a hamstring exercise
- Move the surface slightly closer or farther until you find a better glute hit.
- Shorten the range and add a 2 to 3 second squeeze at the top.
Common form issues
“I feel this in my lower back.”
- Exhale and pull ribs down before you lift.
- Do not chase height. Stop when your body is straight, not arched.
- Think “tuck slightly, then squeeze glutes” at the top.
“I only feel my hamstrings.”
- Bring your feet slightly closer to your butt and drive through heels.
- Think “push the floor away” instead of “pull with hamstrings.”
- Use a 2-second top pause and squeeze glutes first, then lower.
“My knees cave in.”
- Keep feet hip-width and screw them into the floor gently (like twisting outward without moving them).
- Think “knees track over middle toes.”
“My hips wobble on single-leg work.”
- Use the march variation first.
- Cut reps in half and make each rep perfect.
How to program these
You can treat these like a progression ladder. Stick with one variation until you can do it with great control, then level up.
Effort target
- For most working sets, aim for about RPE 7 to 9, meaning you could do 1 to 3 more reps if you had to, without losing form.
- Stop the set when you feel your hamstrings cramp, your ribs pop up, or your lower back takes over.
Beginner routine (10 to 12 minutes)
- Standard glute bridge: 2 sets of 10 to 12 reps (2-second squeeze at top)
- Frog pump: 2 sets of 15 to 25 reps
- Glute bridge march: 2 sets of 6 to 10 marches per side
Strength-focused routine (15 to 20 minutes)
- Feet-elevated glute bridge: 3 sets of 8 to 12 reps (slow lower)
- Single-leg glute bridge: 3 sets of 6 to 10 reps per side
- Frog pump finisher: 1 to 2 sets of 30 to 50 reps (steady pace)
Rest and tempo
- Rest 45 to 75 seconds between sets.
- If you want more challenge without weights, slow down. A controlled 2 seconds up, 2 seconds hold, 3 seconds down is spicy.
When to progress
- Move up a level when you can do 3 sets of 12 with a 2 to 3 second hold at the top, your hips stay level, and you are not cramping in your hamstrings.
- If you can only “feel it” by arching your back higher, you are not ready to progress yet. Own the position first.
FAQ
How often should I do glute bridges?
Two to four times per week works well for most beginners. If you sit a lot, a light set of bridges as a warm-up almost daily can feel great, but keep the hard sets to a few days per week so you recover.
Should I feel glute bridges in my glutes immediately?
Not always. Many people need a week or two of consistent practice to improve the mind-muscle connection. Use pauses at the top, slow lowers, and frog pumps to help your glutes find the work.
Are glute bridges safe for knees?
They are typically very knee-friendly because the movement comes mostly from the hips. If you have an existing knee condition or you are returning from a knee procedure, follow your clinician’s guidance. For everyday training, shorten your range if needed, keep feet flat and stable, and avoid letting knees cave inward.
Glute bridge vs hip thrust, what is the difference?
A hip thrust usually has your upper back elevated on a bench or couch, which can increase range of motion for many people. A glute bridge is done from the floor. Both can be effective. The best choice is the one you can do consistently with good form in your space.
My progression plan
If you want a clear path, follow this for the next few weeks:
- Week 1 to 2: Standard glute bridge and frog pumps, focus on pauses and control.
- Week 3 to 4: Add glute bridge march to build pelvic stability.
- Week 5+: Rotate in single-leg and feet-elevated bridges as your main strength move.
Remember, the goal is not to destroy yourself in one session. The goal is to show up again next week with slightly better reps. Consistency beats intensity, every time.