This quick, beginner-friendly warm-up uses easy mobility and dynamic moves to help you feel looser and more ready to train at home in about 5 minutes, with s...
Home Pulse Fit
•
home workouts and fitness
Standing Foot and Ankle Strength Routine (Wall-Supported)
A short, wall-supported standing routine to wake up your feet and strengthen your ankles: toe spreading, slow heel raises, toe raises, and single-leg balance. Beginner-friendly, with safety tips and seated options.

Marcus Thorne
Marcus Thorne is an NASM-certified personal trainer and the creator behind Home Pulse Fit. After successfully transforming his own health using only bodyweight routines in his small apartment, he left his demanding corporate career to help others do the same. Today, he is dedicated to making fitness accessible, sustainable, and entirely gym-free for busy beginners.
Published
October 18, 2026
Updated
October 18, 2026
If you have ever felt wobbly on stairs, gotten foot cramps in flat shoes, or noticed your balance is not what it used to be, your feet and ankles are probably asking for a little attention. Not a two-hour workout. Not a fancy gadget. Just a few focused minutes where you move slowly, feel the right muscles working, and practice control.
This routine is designed to be done standing beside a wall so you can use a stable handhold. That support lets you train strength and balance without the “don’t fall” stress taking over. You will work toe control, calf strength, shin strength, and single-leg stability in a simple, repeatable sequence.
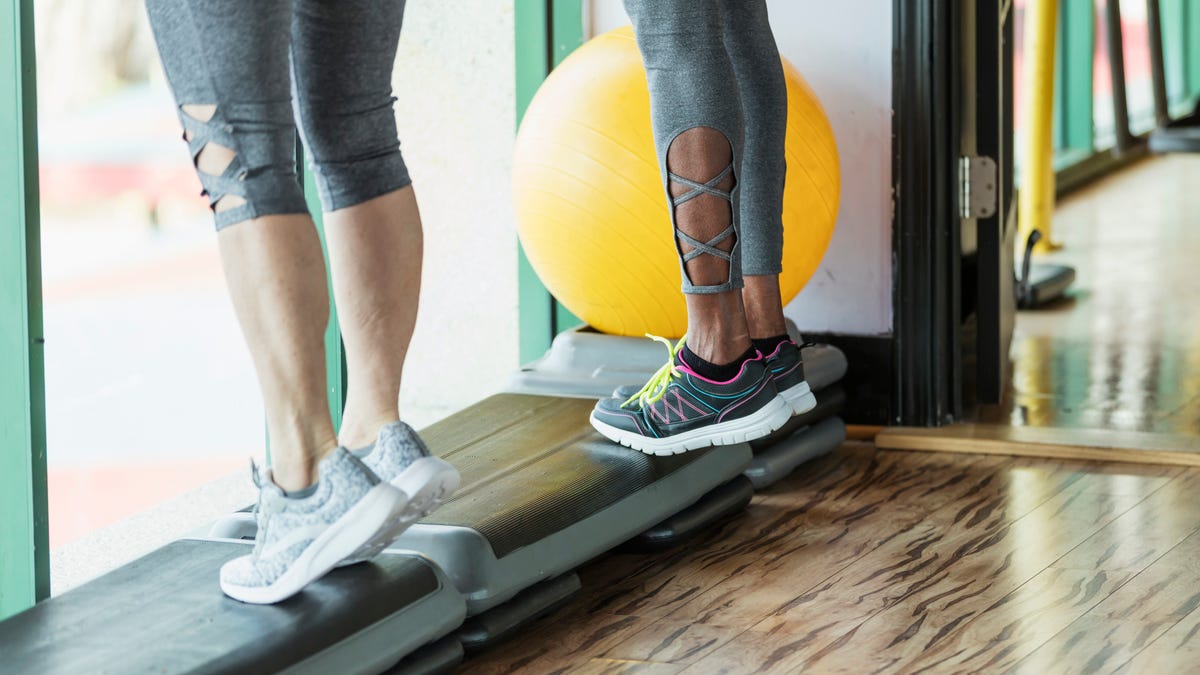
What you need
- A wall: Stand close enough that your fingertips can touch it without leaning your body weight into it.
- Comfortable shoes or barefoot: Barefoot can give you clearer feedback. If barefoot feels too intense, start in flat, stable shoes.
- About 6 to 10 minutes: You can do one round on busy days or two rounds when you have time.
Wall setup tip: Stand tall, ribs stacked over hips, and keep your handhold light. Think of the wall as a seatbelt, not a crutch.
Quick safety note: If you have diabetes-related loss of sensation, peripheral neuropathy, significant arthritis, or you are in a plantar fasciitis flare, supportive shoes may be the smarter choice than barefoot. When in doubt, choose the option that feels stable and predictable.
Effort vs pain
You should feel muscle effort in places like:
- The arch and underside of the foot during toe work
- The calf during heel raises
- The front of the shin during toe raises
- The outer hip and ankle working together during balance
You should not push through:
- Sharp, stabbing pain
- Burning that feels nerve-like or “hot and zinging” (not normal muscle fatigue)
- Numbness or tingling
- Joint pain that feels pinchy in the ankle
- Giving way, repeated ankle rolling, or instability that does not improve when you use a handhold
If pain is persistent, worsening, or your ankle feels unstable even with support, stop and get it checked by a qualified clinician. This is a strength routine, not a fix-everything protocol.
The routine
Move through the four drills in order. Rest as needed, but keep it smooth and deliberate. If you are brand new, start with one round. If you have been consistent for a couple weeks, build to two rounds.
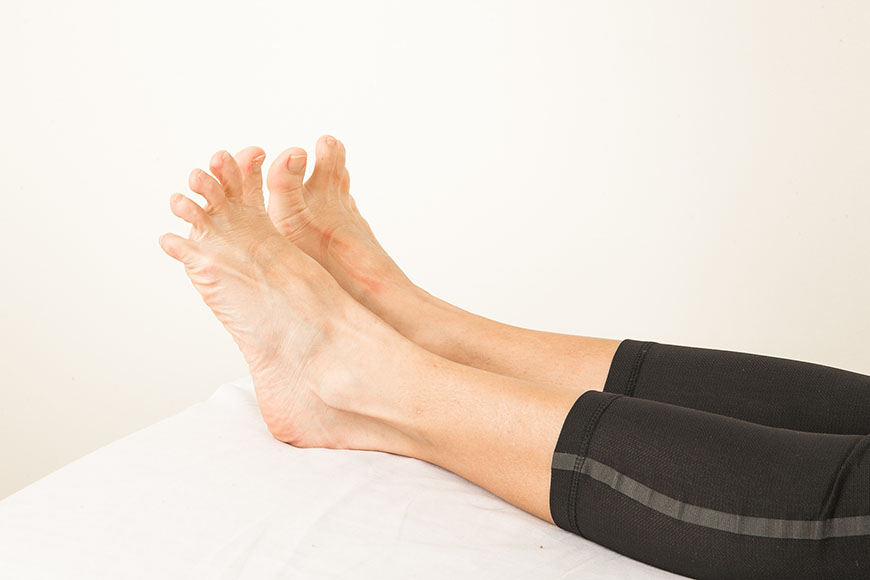
1) Toe spreading
Goal: Teach your toes to separate and lightly press into the floor without curling into a claw.
- Position: Stand tall beside the wall. Light fingertips on the wall. Feet hip-width.
- Action: Spread your toes as wide as you can, then relax them back down without gripping.
- Key cue: Keep the toes long. If you feel a toe trying to curl, make the spread smaller and slower.
- Reps: 8 to 12 slow spreads
- Tempo: 2 seconds spread, 2 seconds relax
Range choice: Your toes may barely move at first. That is normal. Keep it small and smooth. The win is control, not maximum spread.
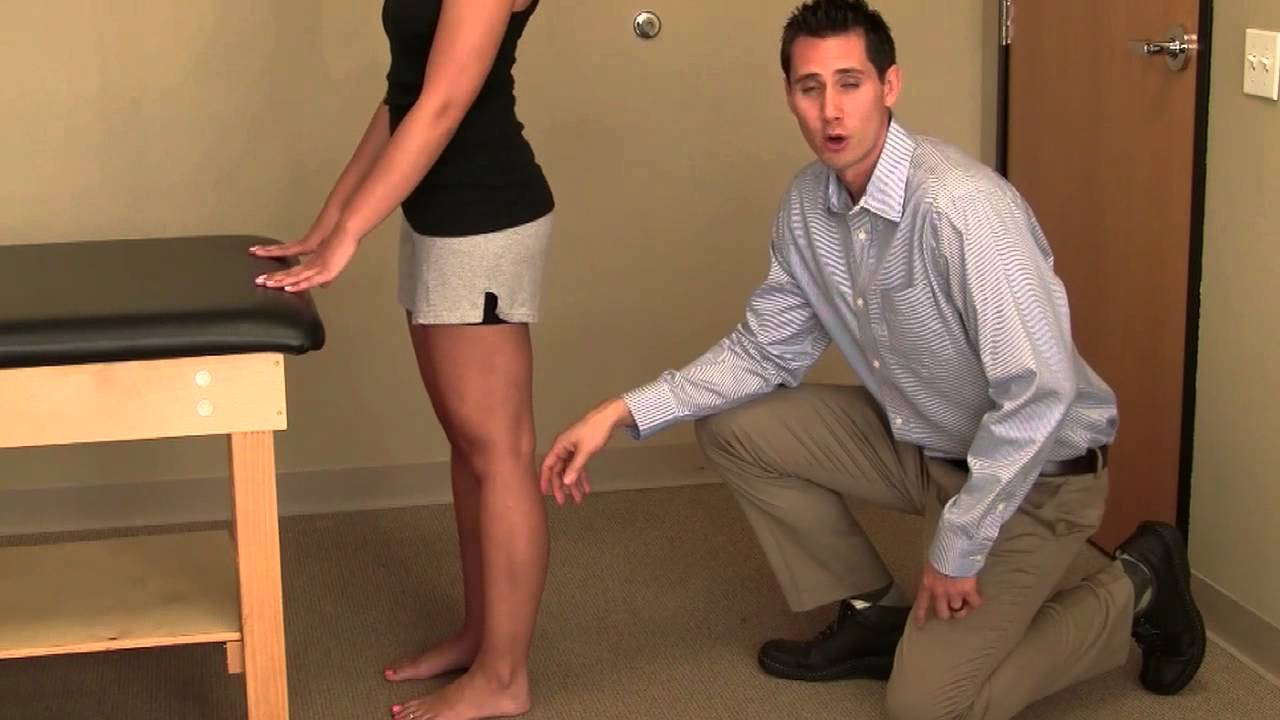
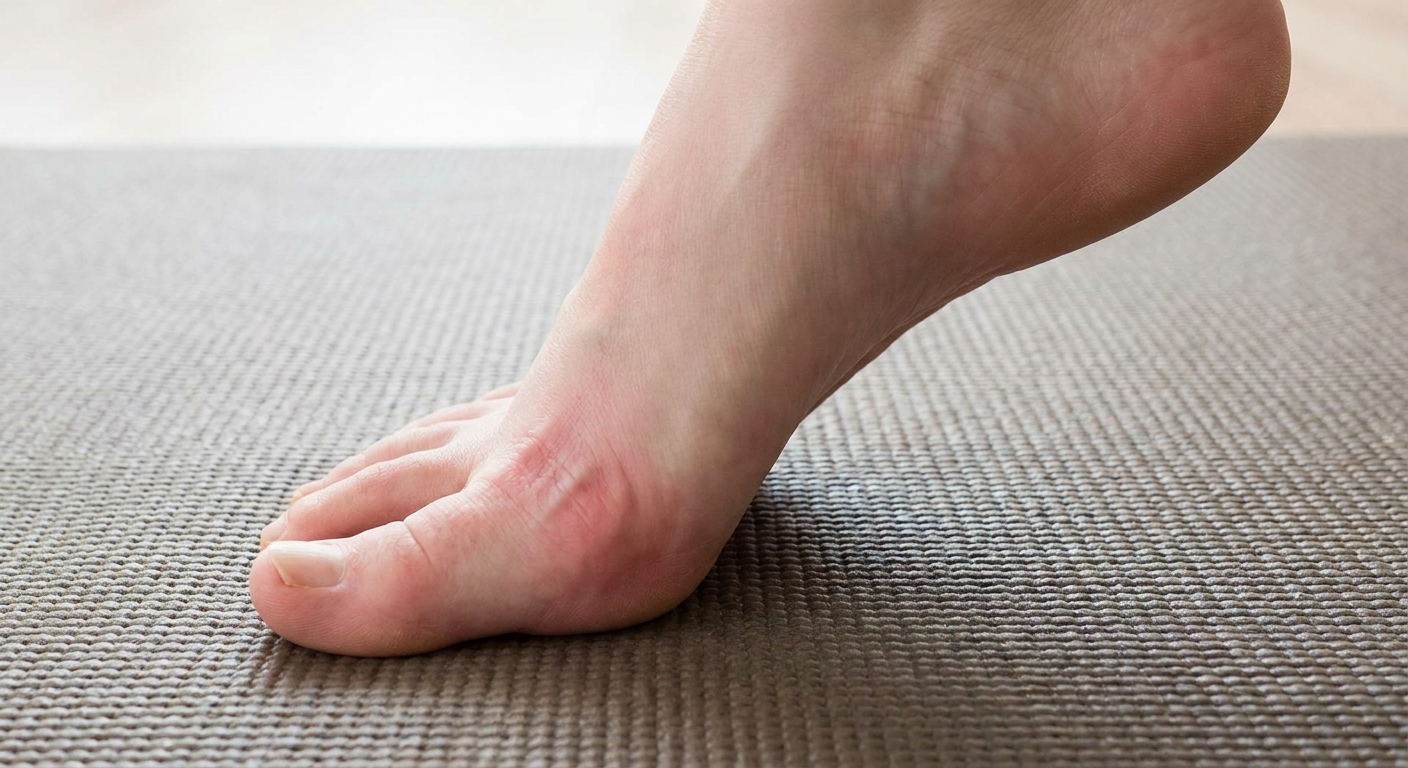
2) Heel raises
Goal: Build strong calves and practice ankle control through a clean range of motion.
- Position: Feet hip-width, tall posture, light hand on the wall.
- Action: Rise onto the balls of your feet, pause at the top, then lower slowly until heels are back down.
- Key cue: Knees stay mostly straight but not locked. Do not let the ankles roll outward as you rise.
- Reps: 8 to 15
- Tempo: 2 seconds up, 1 second hold, 3 seconds down
Range choice: Lift as high as you can without your ankles rolling outward or your big toe losing contact. If you feel yourself dumping to the outside edge of the foot, lower your height and focus on even pressure across the ball of the foot.
What you should feel: Strong calf work. A steady, centered foot. Mild fatigue is good. If you cramp, shake out your calves, then do fewer reps next set.
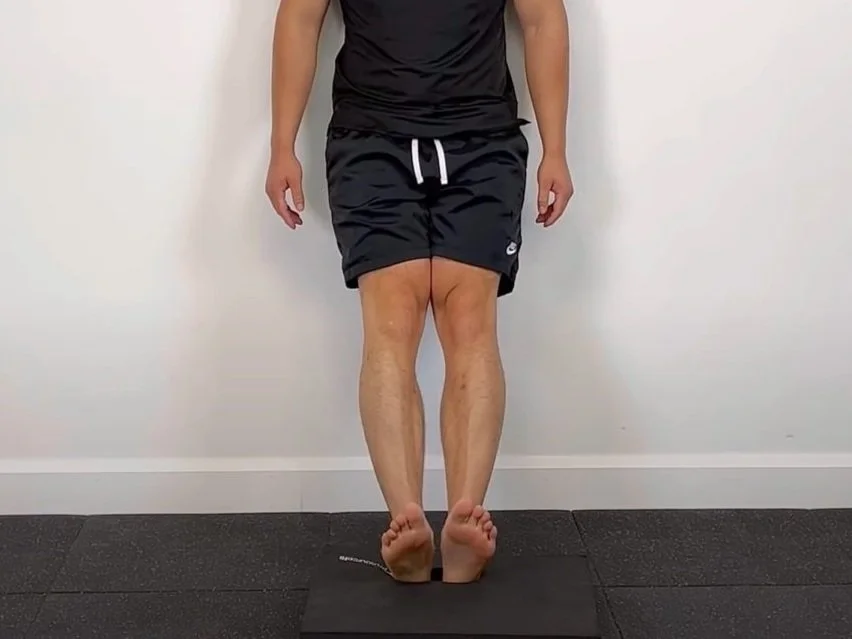
3) Toe raises
Goal: Strengthen the front of your lower leg and practice lifting the forefoot without leaning back.
- Position: Stand tall, feet hip-width. Light support on the wall.
- Action: Keep heels planted and lift your toes and the front of your feet off the ground. Pause, then lower with control.
- Key cue: Stay stacked over midfoot. Make the shins do the work, not a backward body lean.
- Reps: 10 to 20
- Tempo: 2 seconds up, 1 second hold, 2 seconds down
Range choice: If you can only lift the toes a little, that counts. Stay smooth. Think: “shins pull the toes up,” not “lean to get it done.”
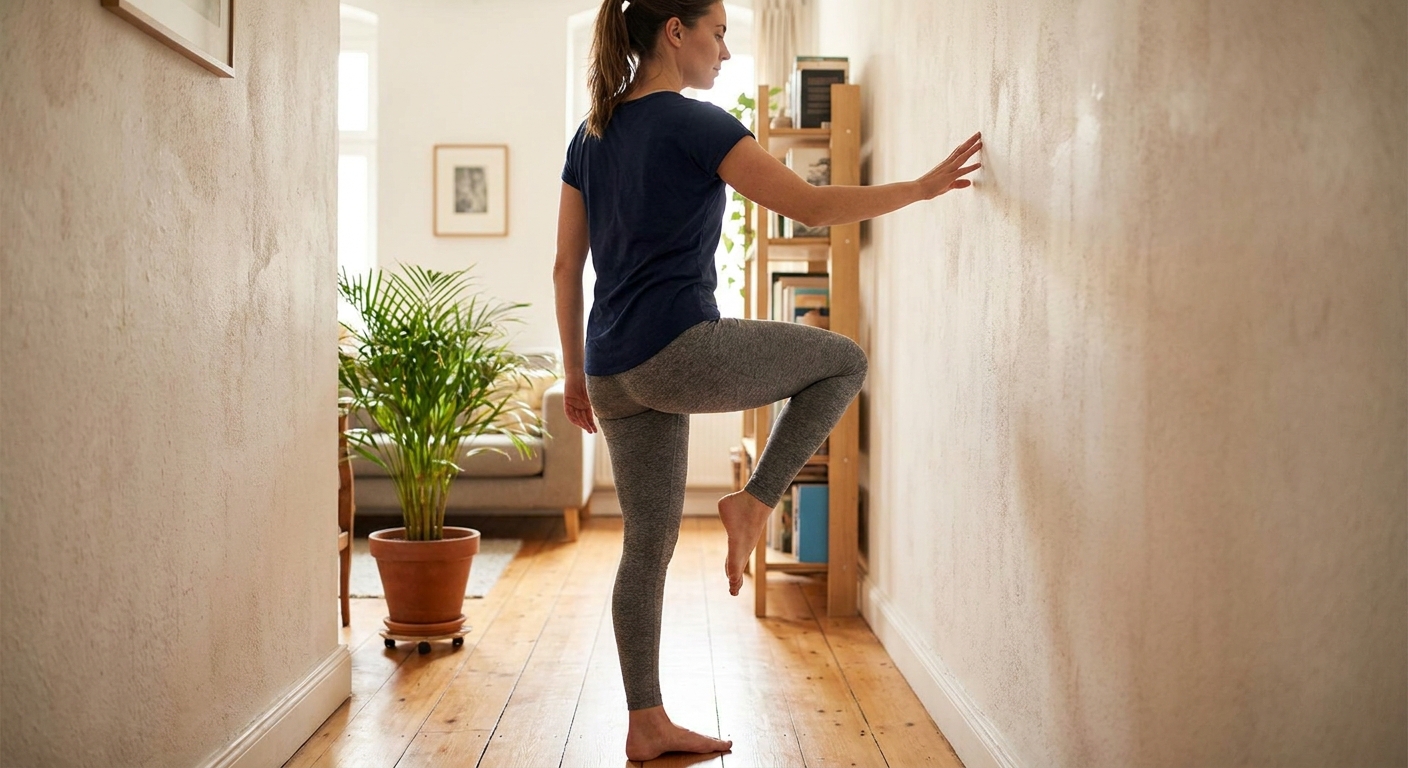
4) Single-leg balance
Goal: Train your ankle to make small corrections while your whole body stays calm.
- Position: Stand beside the wall. Place two fingers on the wall at first. Shift weight onto one foot.
- Action: Lift the other foot a few inches off the floor. Hold steady without gripping your toes.
- Key cue: Keep the stance knee soft and your tripod foot (big toe base, little toe base, heel) heavy on the floor.
- Time: 20 to 40 seconds per side
Progression options (choose one):
- Lighter touch: Go from two fingers to one finger.
- Head turns: Slowly turn your head left and right while maintaining balance.
- Hover taps: Lightly tap the lifted foot to the floor every 5 seconds, then re-lift without losing posture.
Range choice: If your ankle is shaking, that is normal. If it feels like it is going to give way, reduce the challenge by using more fingers on the wall or shortening the hold.
Reps and schedule
I chose these rep ranges for one reason: they are long enough to build control and endurance in small muscles, but not so long you dread doing them.
- Toe spreading: 8 to 12 reps builds coordination without rushing.
- Heel raises: 8 to 15 reps with a slow lower builds strength where many people are missing it.
- Toe raises: 10 to 20 reps targets the shins, which are a common weak link compared to calves.
- Balance holds: 20 to 40 seconds is long enough for your ankle to learn, not just survive.
Weekly frequency: 3 to 5 days per week works great. This is low-drama training you can repeat often.
Make it easier or harder
Easier
- Use a firmer handhold on the wall, especially for balance.
- Reduce range of motion on heel raises and toe raises.
- Do one round only and stop while you still feel good.
Harder
- Slow down the lowering phase on heel raises to 4 to 5 seconds.
- Pause longer at the top of heel raises and toe raises.
- For balance, lighten your wall touch and extend holds up to 60 seconds.
My favorite quiet upgrade: Keep the routine exactly the same and simply make every rep more controlled. Consistency beats intensity every time.
Common fixes
- If your feet roll outward on heel raises: Press through the base of the big toe and the second toe, and lift a little less high.
- If your toes curl during toe spreading: Think “long toes,” not “claw.” Spread gently, then relax.
- If toe raises feel like a hip hinge: Keep your ribs stacked over hips and lift from the shins, not by leaning back.
- If balance feels impossible: Bring your gaze to one spot on the wall and use more fingers. You are training the skill, not proving something.
Seated options
If standing work is not comfortable right now, you can still train the same pieces from a chair and build up.
- Seated toe spreading: Feet flat. Spread toes, relax. 8 to 12 reps.
- Seated toe raises: Heels down, lift the forefoot. 10 to 20 reps.
- Seated heel raises: Toes down, lift the heels. 8 to 15 reps with a slow lower.
Once those feel steady, return to the standing version with a light wall handhold.
When to do it
This routine fits nicely after a short walk, after a warm shower, or as a quick reset after long desk time. If your feet are sensitive first thing in the morning, do it later in the day when you feel looser.
FAQ
Should I do this barefoot?
If you can do it comfortably, barefoot can give you better feedback and help you learn even pressure across the foot. If barefoot is uncomfortable, or if you have reduced sensation or a flare-up that needs more support, start in flat, stable shoes.
Is it normal to shake during balance?
Yes. Shaking is often your nervous system learning to coordinate. Use the wall more, shorten the hold, and build up over time.
What if I feel this in my ankles but also in my knees?
Mild stabilizing work up the chain can be normal. If you feel knee pain, back off range, keep a soft knee bend, and focus on slow control. If pain persists, stop.
How soon will I notice a difference?
Many people report feeling steadier within 2 to 3 weeks when they practice consistently. Strength and control keep building after that, especially if you stay patient and keep the reps clean.
The takeaway
You do not need a gym to build stronger feet and steadier ankles. You need a wall, a few minutes, and the willingness to go slow. Start with one round, keep the handhold light, and let consistency do the heavy lifting.