Actionable ways to keep challenging your muscles without weights: harder variations, tempo, range of motion, density, and smart tracking for real muscle grow...
Home Pulse Fit
•
home workouts and fitness
Perfect Push-Up Form at Home
Learn how to do a push-up with clean form at home. Step-by-step setup, hand placement, breathing cues, plus wall, incline, and knee options for beginners.

Marcus Thorne
Marcus Thorne is an NASM-certified personal trainer and the creator behind Home Pulse Fit. After successfully transforming his own health using only bodyweight routines in his small apartment, he left his demanding corporate career to help others do the same. Today, he is dedicated to making fitness accessible, sustainable, and entirely gym-free for busy beginners.
Published
October 18, 2026
Updated
October 18, 2026
Push-ups have a reputation for being brutal. I get it. When I first started training in my tiny apartment, I could “do push-ups”… but my hips sagged, my elbows flared, and my neck did this weird turtle thing. The good news is push-ups are not a talent you either have or you do not. They are a skill. And like any skill, the fastest way to improve is to practice the basics the same way, every time.
This guide will walk you through a clean, beginner-friendly push-up you can do at home, plus a few simple modifications (wall, incline, and knees) to build strength without beating up your shoulders or wrists.
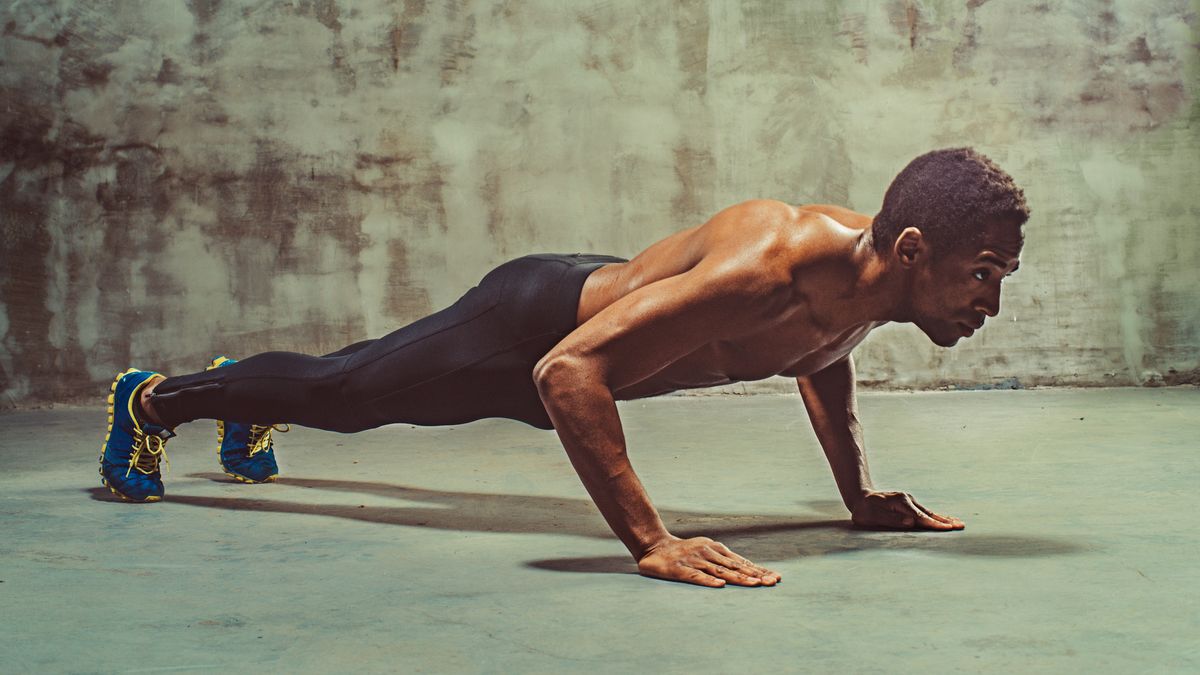
What good form is
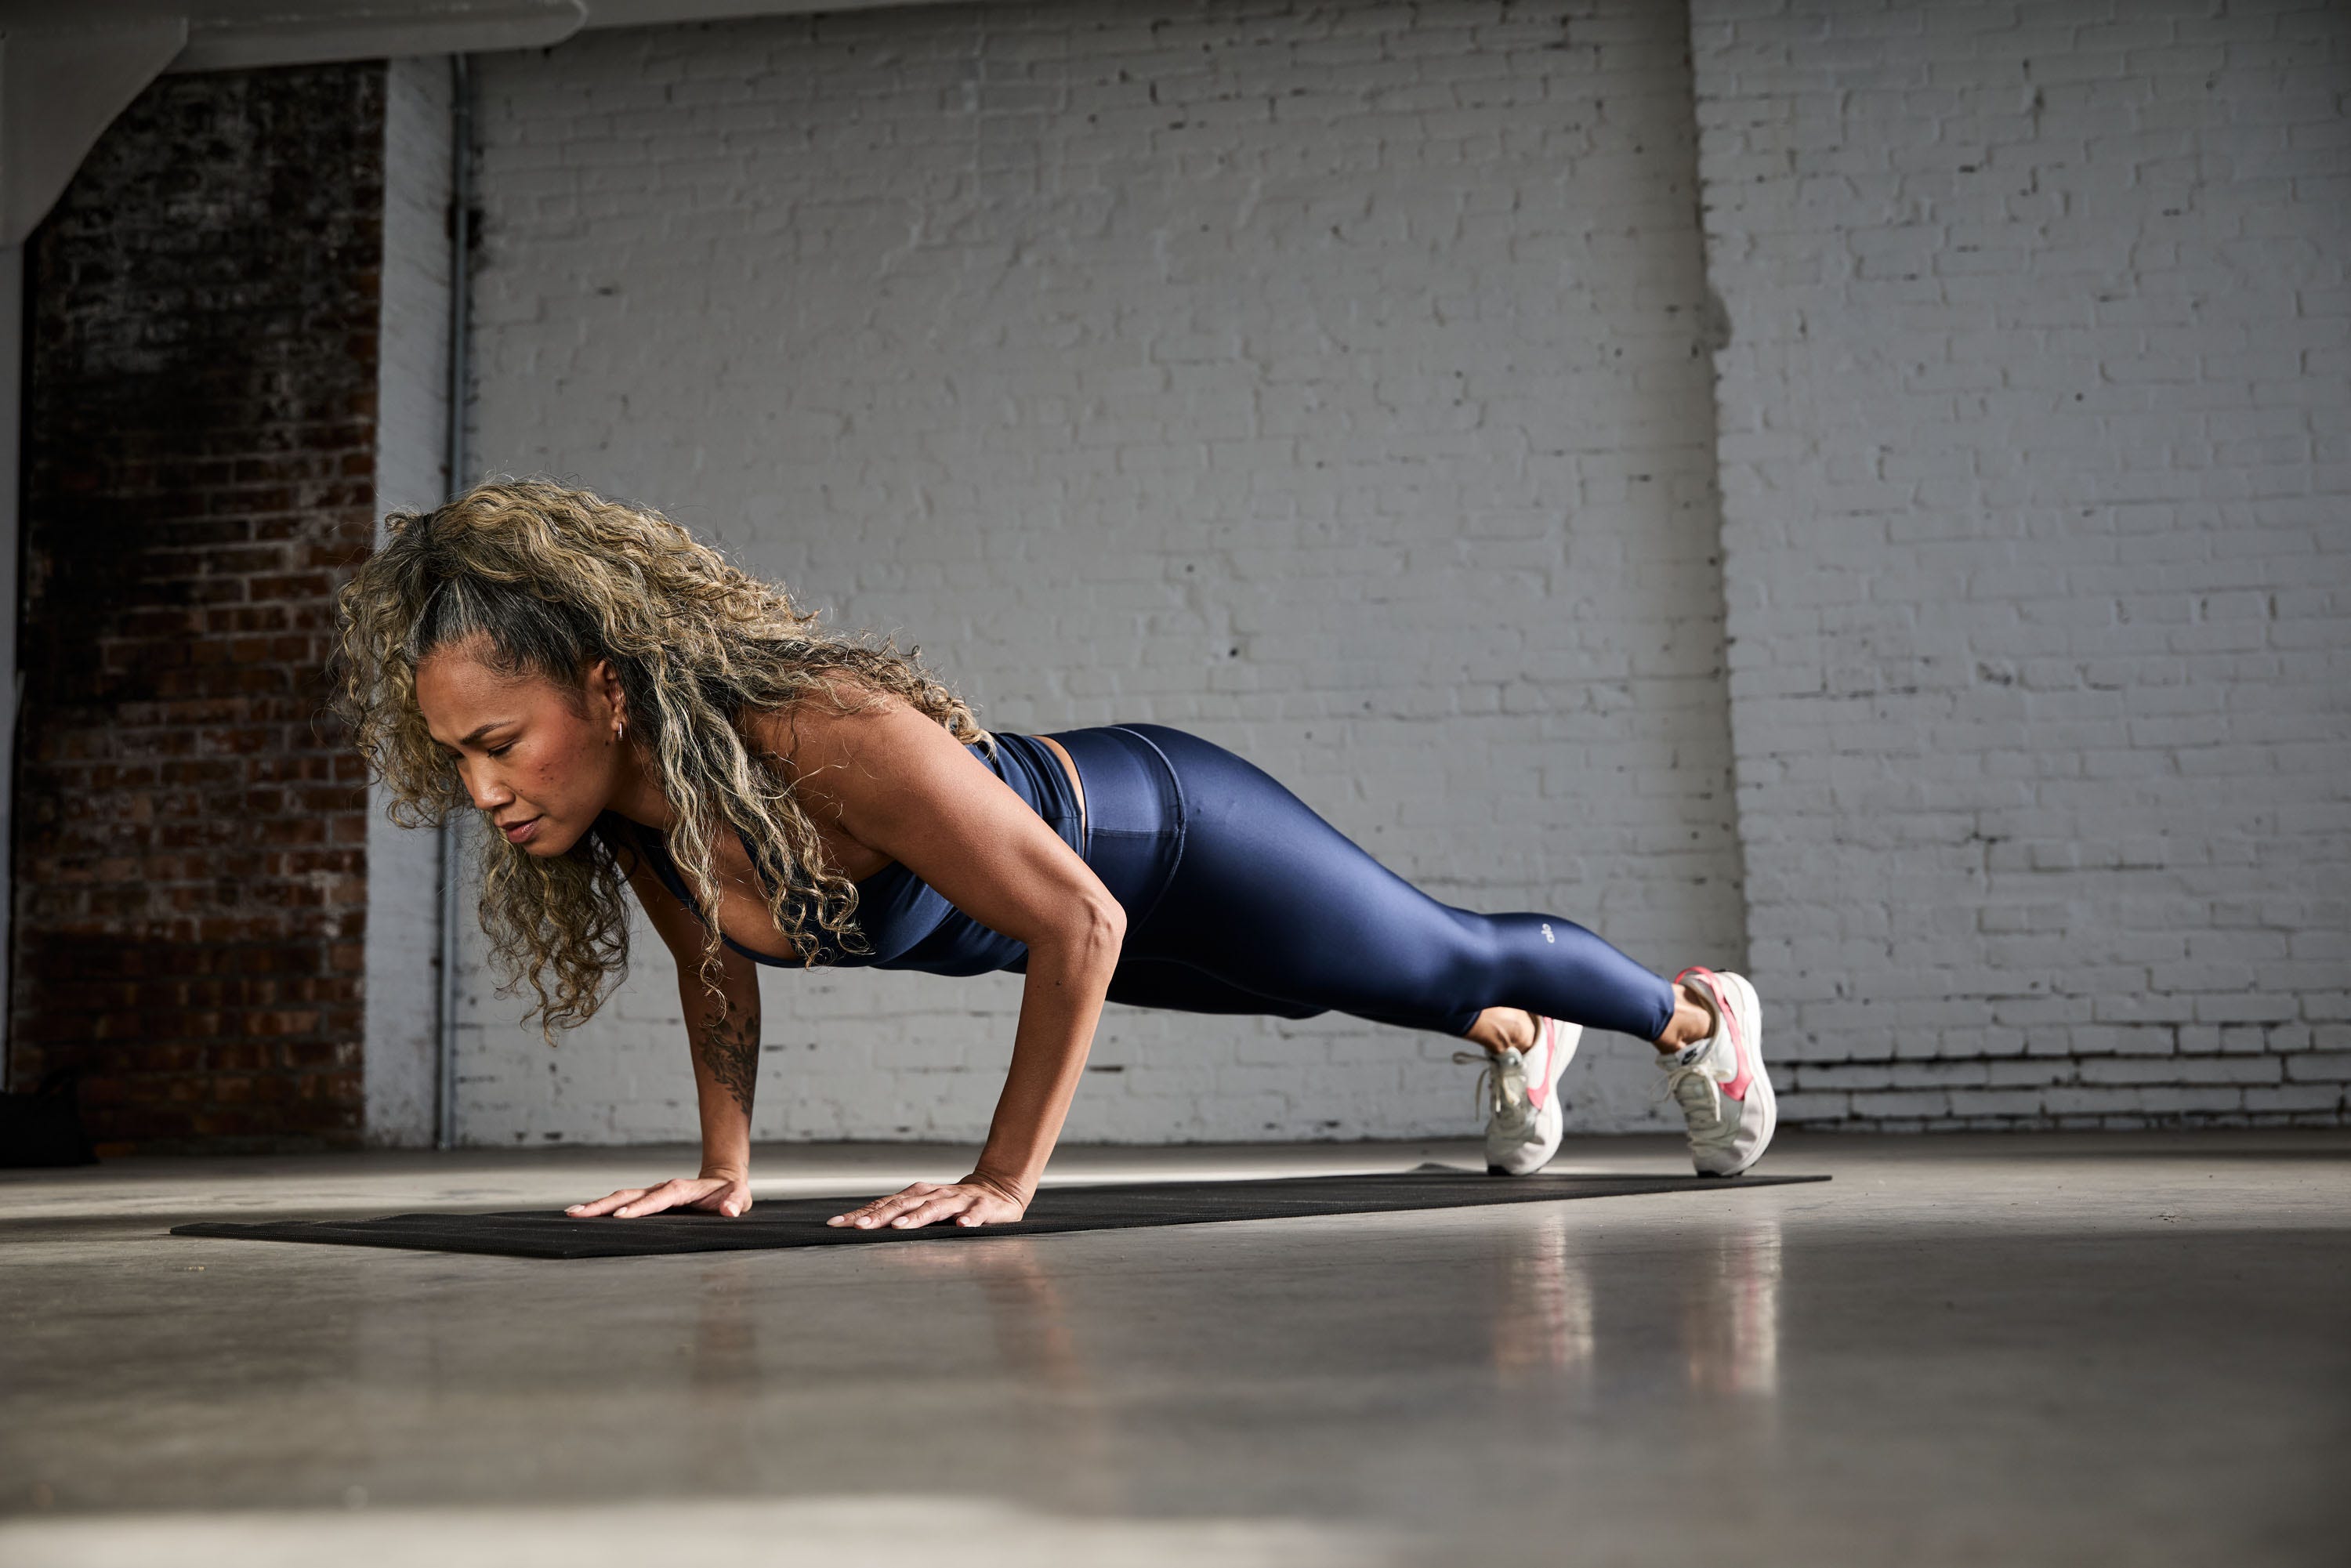
A solid push-up is simply a moving plank.
- Your whole body stays braced (ribs down, glutes tight, legs active).
- Your chest and hips lower together (no worming, no sagging).
- Your elbows bend at a comfortable angle (not glued to your sides, not flared straight out).
- You hit a repeatable depth (ideally chest close to the floor) and press back up without losing your line.
Done well, push-ups train your chest, shoulders, triceps, core, and even your glutes. Done sloppy, they often turn into a shoulder crank and a low back complaint.
Quick self-check
If you are a true beginner, the fastest path to full push-ups is choosing a version you can do with control. Use this simple test:
- If you cannot hold a strong plank for 20 seconds without your low back taking over, start with wall push-ups.
- If you can plank for 20 seconds but full push-ups fall apart after 1 to 3 reps, start with incline or knee push-ups.
- If you can do 5 clean knee push-ups with the same form every rep, begin practicing full push-ups in small sets.
There is no “lesser” version here. There is only “the version that lets you practice great form.”
Quick warm-up
Give yourself 60 seconds before your first set. It makes everything feel better.
- Shoulder circles: 10 forward, 10 backward.
- Scapular push-ups: 6 to 10 reps (straight arms, let your chest sink slightly, then push the floor away).
- Easy incline reps: 5 slow push-ups against a countertop or wall to groove the pattern.
Your setup
1) Hands
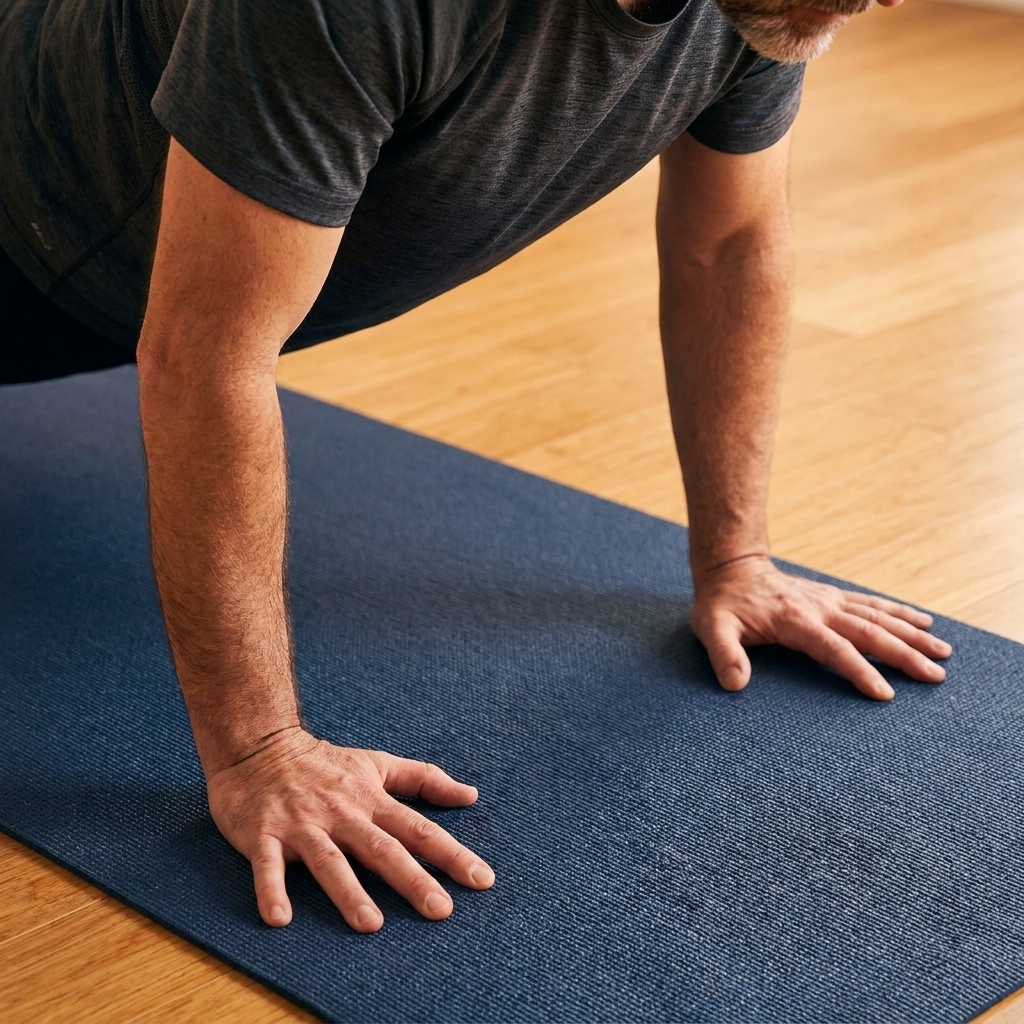
Start in a high plank with your hands on the floor.
- Hand width: about shoulder-width apart.
- Hand position: wrists under or slightly in front of your shoulders. Pick the spot that lets you lower without your shoulders feeling jammed.
- Grip: spread your fingers, press through the whole hand, especially the base of your index finger and thumb.
Beginner cue: imagine you are “screwing” your hands into the floor without actually moving them. This gently turns your upper arms outward and helps your shoulders feel more stable.
2) Body line
- Feet: hip-width to shoulder-width apart. Wider often feels more stable.
- Glutes: squeeze them lightly like you are bracing for a photo.
- Ribs: keep them “down” so your lower back does not sag, but do not force a hard crunch. Think braced, not curled.
- Legs: press your heels back to keep your body long.
Beginner cue: think “head to heels like a board.” If you feel it mostly in your low back, reset and squeeze your glutes harder.
3) Head and neck
Your neck should stay neutral. Look at the floor a few inches in front of your hands, not at the mirror and not between your feet.
- Good sign: you feel long through the back of your neck.
- Common mistake: chin jutting forward as you get tired.
The push-up
Step 1: Lower
Take a breath in and lower your body as one unit.
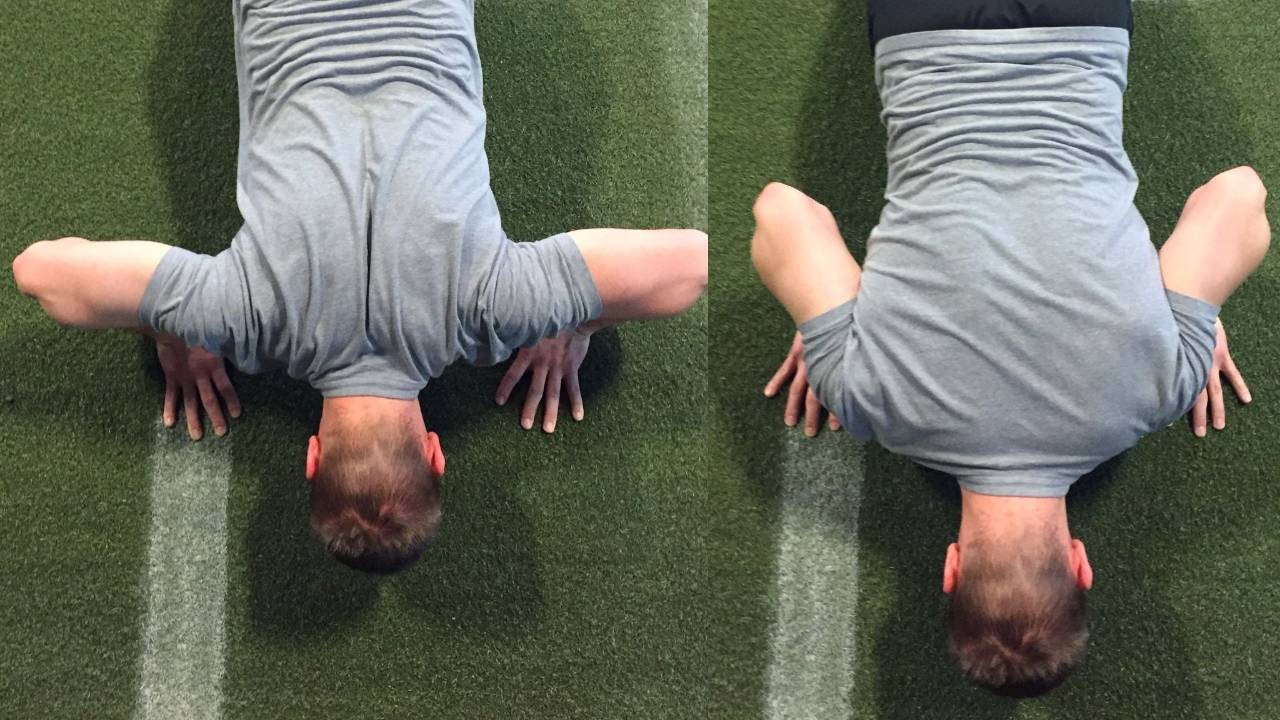
- Elbow path: aim for elbows about 30 to 45 degrees away from your torso (not flared straight out).
- Shoulders: keep them stable and away from your ears. Do not jam them back hard. Think controlled, not shrugged.
- Tempo: 2 seconds down is a great training pace for beginners.
Depth target: chest close to the floor while your body stays in a straight line. If you can only go halfway without losing form, go halfway for now and build from there.
Step 2: Pause
Pause for half a second at the bottom while staying tight. This prevents bouncing and teaches true control. If the pause makes you collapse, skip it at first.
Step 3: Press
Exhale as you push back up. Think “push the floor away” rather than “lift my body.” At the top, reach the floor away just enough to keep your shoulder blades moving naturally, not pinched together.
- Finish: elbows straighten, body stays braced, shoulders stay stable.
- Reset: take a breath, re-brace, and repeat.
Beginner modifications
If full push-ups feel like a fight with gravity, that is normal. Use these to build strength while keeping your joints happy.
Wall push-up
This reduces the load dramatically and lets you practice clean mechanics.
- Stand facing a wall, arms straight, hands on the wall at shoulder height and shoulder-width.
- Walk your feet back until you feel a light challenge while keeping a straight line from head to heels.
- Lower your chest toward the wall, elbows at about 30 to 45 degrees.
- Press back to start without shrugging your shoulders.
Make it harder: step your feet farther back. Make it easier: step closer.

Incline push-up
If you have access to a sturdy surface, incline push-ups are one of the best ways to bridge the gap to the floor. They feel more like a full push-up than the wall version, with less load than the floor.
- Place hands on a sturdy countertop, table, or the back of a solid couch.
- Walk feet back until your body is a straight line.
- Lower chest toward the surface with elbows 30 to 45 degrees.
- Press back up and keep your body moving as one unit.
Progression tip: as you get stronger, use a lower surface.
Knee push-up
Knee push-ups get a bad rap because people often do them with a bent-at-the-hips posture. We are not doing that here. Your body should still move as one unit.
- Start in a high plank, then gently lower your knees to the floor.
- Adjust your knee position until you can keep a straight line from head to knees. Avoid a big hip bend.
- Squeeze glutes, brace your core, and lower your chest toward the floor.
- Press back up, keeping your hips from shooting up first.
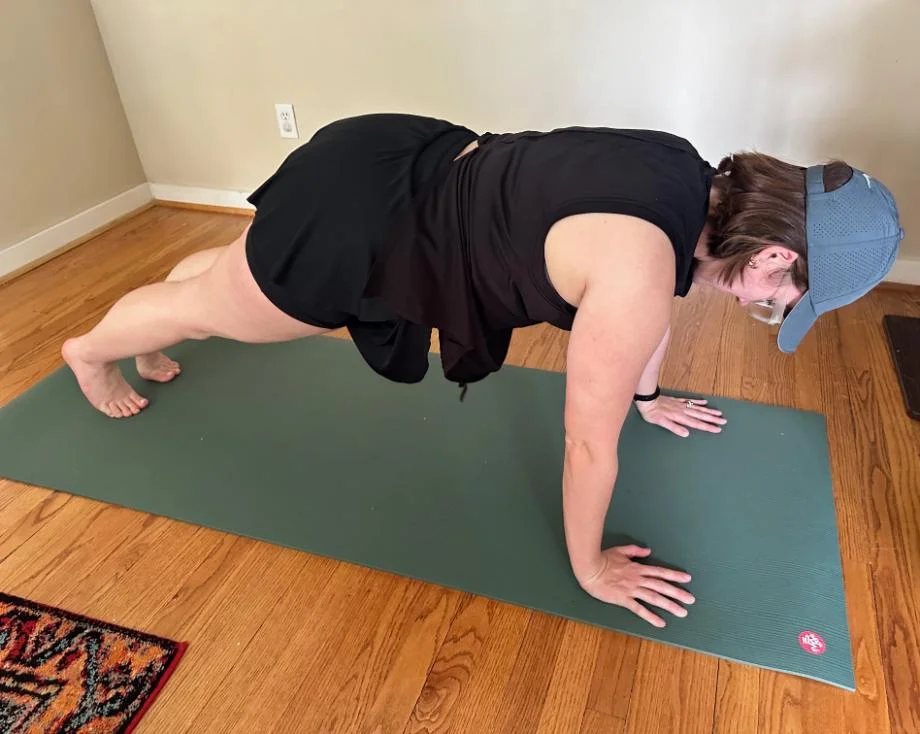
Form check: if it looks like a bow at the hips, reset your line and adjust your knees until head, ribs, hips, and knees move together.
Common mistakes
1) Hips sagging
What it feels like: low back taking over, “banana” shape.
Fix: squeeze glutes, tighten thighs, exhale before you lower. If you still sag, use wall or incline push-ups for now.
2) Hips popping up first
What it looks like: you turn the push-up into a weird downward dog.
Fix: slow down the lowering phase and use knee or incline push-ups until you can move as one unit.
3) Elbows flaring
What it risks: cranky shoulders over time.
Fix: aim elbows 30 to 45 degrees from your body and think “bend my elbows back” rather than “out.”
4) Hands too far forward
What it causes: shoulders doing everything, wrists feeling overloaded.
Fix: set wrists under or slightly in front of your shoulders. Film yourself once from the side if you are unsure.
5) Shrinking range
Fix: choose a version where you can hit the same depth every rep. Consistent range beats random effort.
Wrist-friendly options
Wrist discomfort can happen when you are new, especially if you spend your day at a keyboard like I used to. It is not something you have to “push through.”
- Warm up your wrists: gentle wrist circles and a few slow “rock forward and back” leans in a hands-and-knees position.
- Try an incline: hands on a sturdy countertop or couch can reduce wrist angle and load.
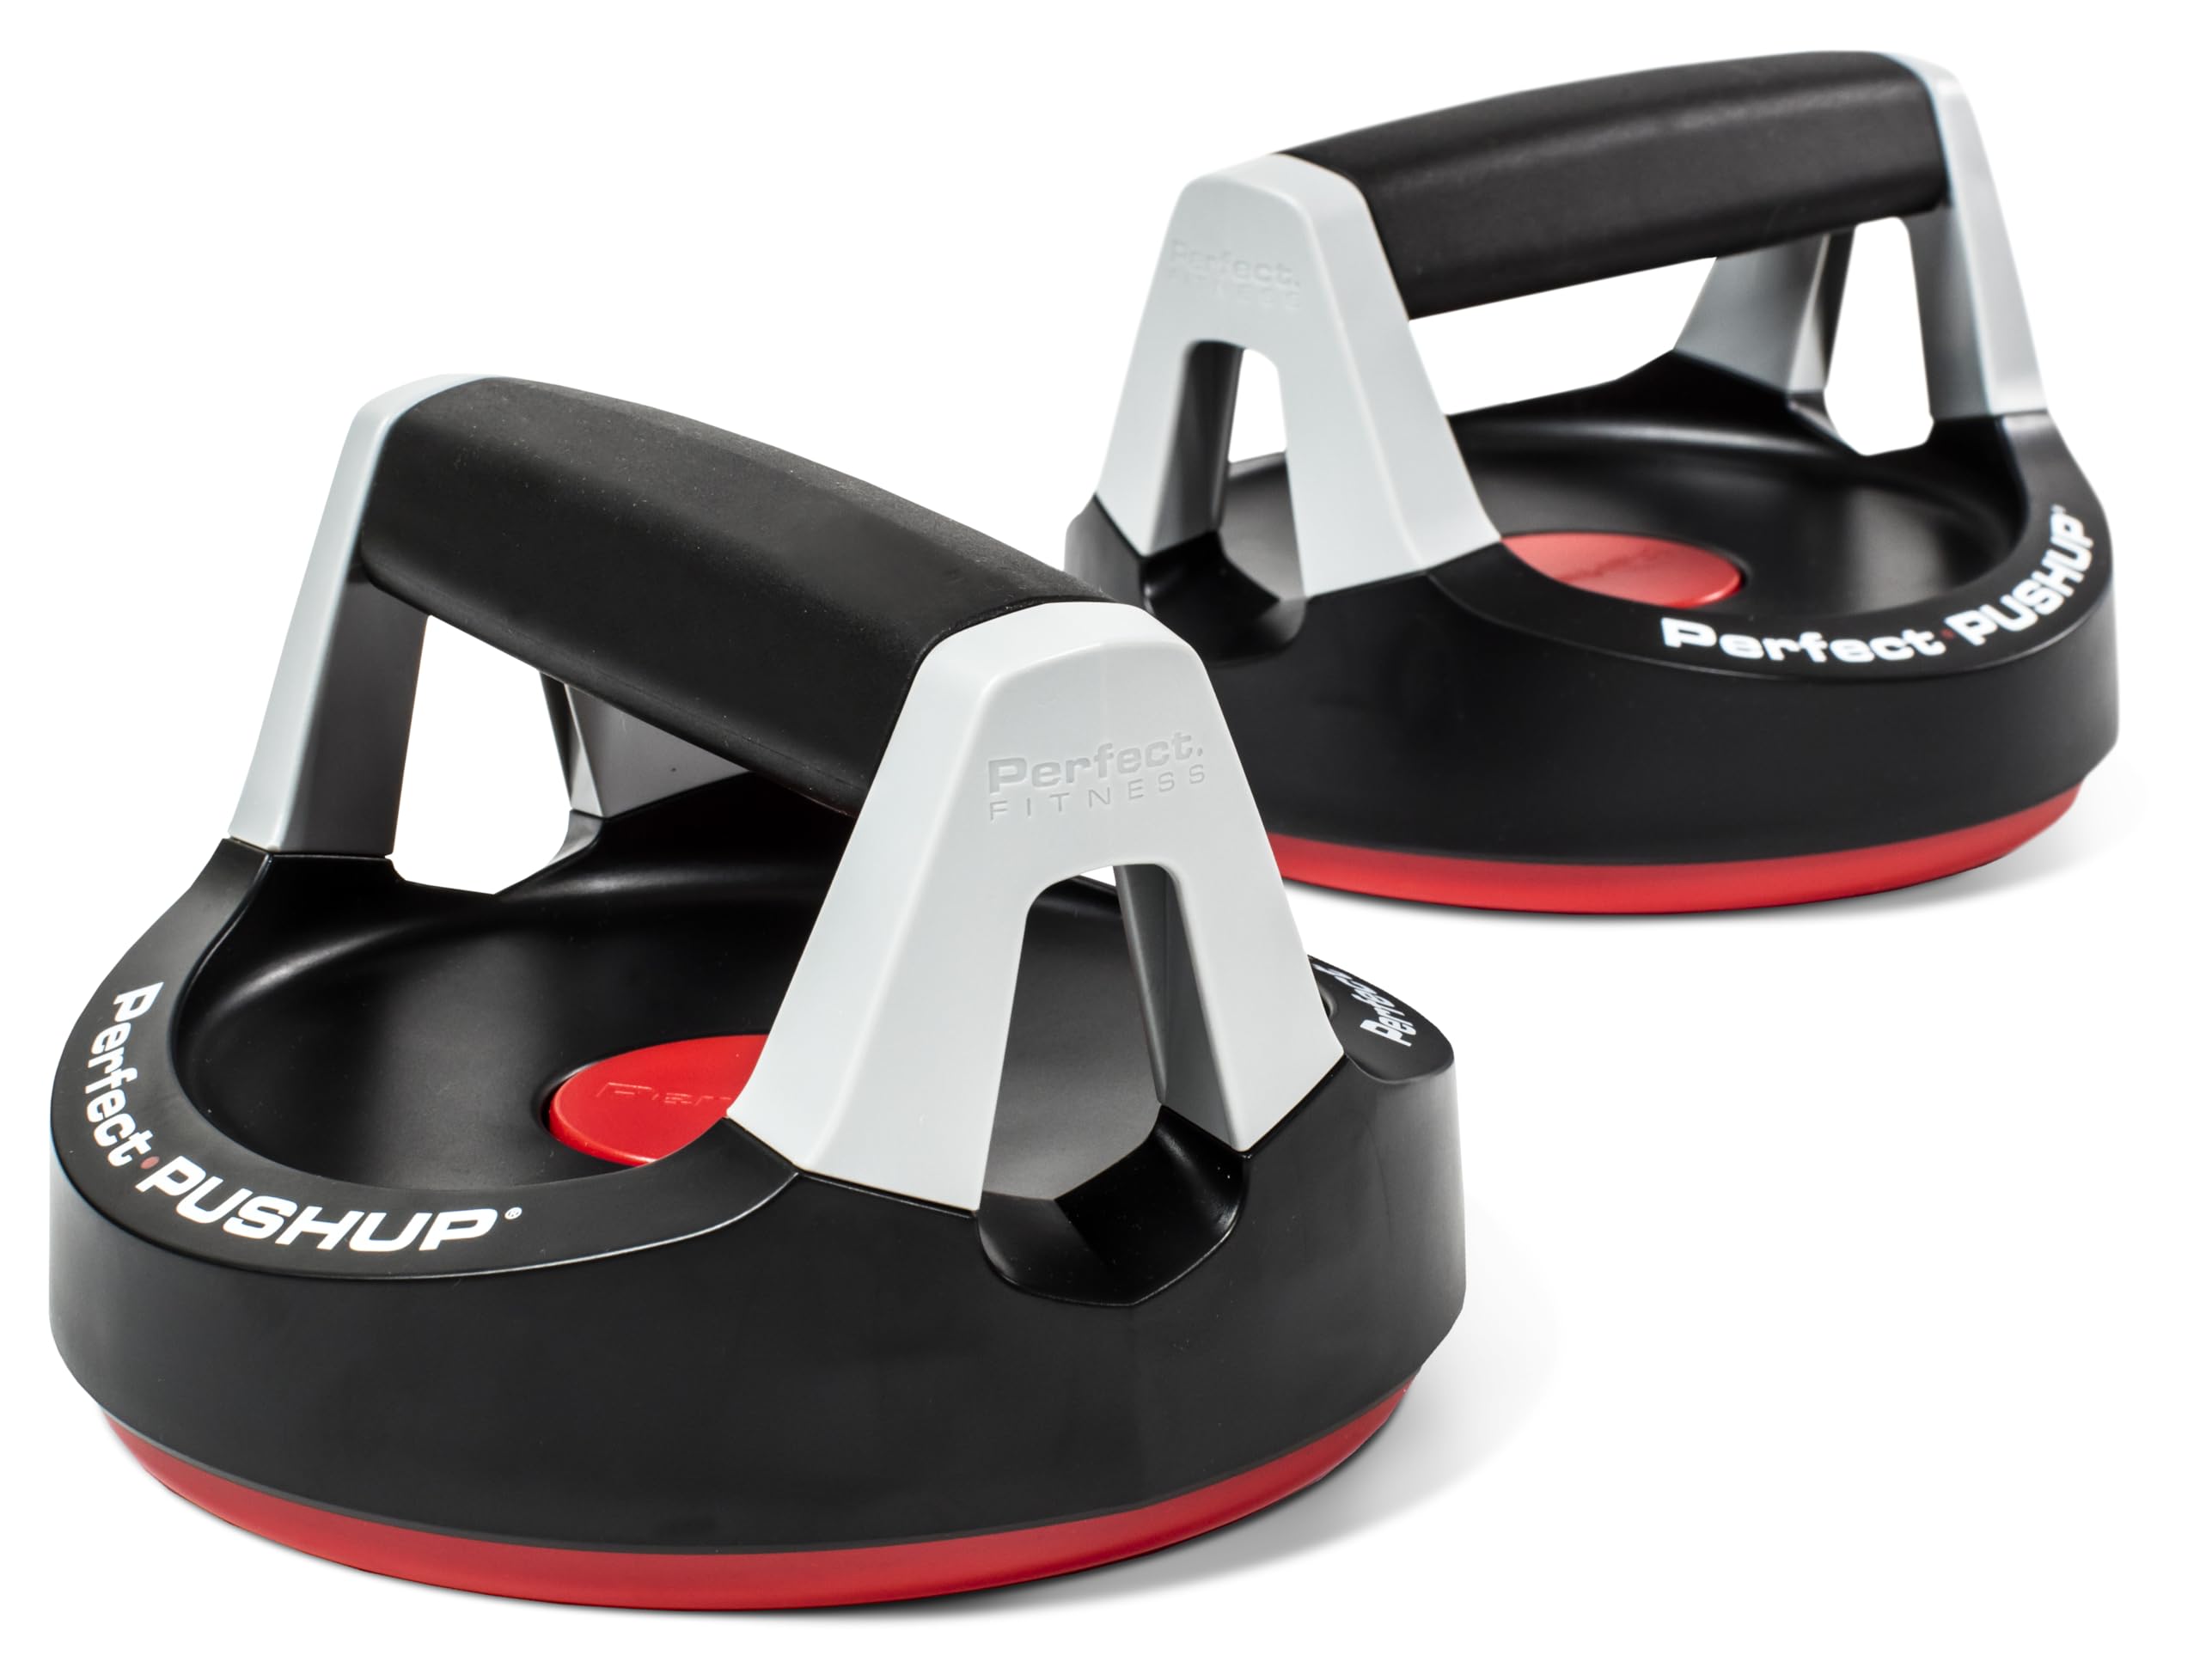
- Use push-up handles or hex dumbbells: a neutral grip can feel better than palms flat. Make sure they are stable and do not roll.
- Check hand pressure: press through the whole hand, not just the heel of the palm.
If you feel sharp pain, numbness, or pain that persists or worsens, stop and consider checking in with a qualified clinician.
Beginner plan
Your goal is not to annihilate yourself. Your goal is to practice clean reps often enough that your body learns them.
Do this 3 days per week
- Week 1 to 2: 3 sets of 6 to 10 wall or incline push-ups, resting 60 to 90 seconds.
- Week 3 to 4: 3 to 4 sets of 5 to 8 knee push-ups (or a harder incline), resting 60 to 90 seconds.
- Then: start each workout with 3 to 5 sets of 1 to 3 full push-ups with perfect form, then finish with knee or incline push-ups for extra volume.
Simple progression rule: when you can hit the top of the rep range for all sets with clean form, make the exercise slightly harder next time (step farther back at the wall, choose a lower incline, or add 1 rep per set).
Rule I live by: stop each set with 1 to 2 reps left in the tank. When form breaks, the set is over. That is how beginners build strength fast without getting sidelined.
Breathing
Breathing helps you stay braced and makes reps feel smoother.
- Inhale as you lower.
- Exhale as you press up.
If you get shaky, try a slightly stronger exhale right before you lower, then inhale on the way down. Think of it like tightening a belt around your midsection.
FAQ
How many push-ups should a beginner do?
Enough to practice great reps, not enough to fall apart. For most beginners, 3 sets of 5 to 10 in a modified version is a sweet spot.
Why do my shoulders hurt during push-ups?
Common causes are elbows flaring, hands too far forward, or letting shoulders shrug up toward your ears. Adjust elbow angle, bring hands under or slightly in front of shoulders, and keep your body rigid. If pain is sharp or persists, stop and consider getting your form checked by a qualified pro.
Are knee push-ups real push-ups?
They are a real strength exercise and a great stepping stone. If your knee reps are clean, controlled, and full range, they are doing their job.
Should my chest touch the floor?
Eventually, yes for a full-range push-up. But for beginners, the priority is keeping a straight body line. Go as low as you can without hips sagging or shoulders collapsing, and build depth over time.
How often should I train push-ups?
Two to four times per week works well. More often can be fine if you keep volume reasonable and do not grind ugly reps.
One cue
If you only remember one thing, make it this: move like a plank.
When your push-up becomes a clean moving plank, everything improves. Strength, shoulder comfort, and confidence.
Pick the version you can do with control today, hit a few sets a few times a week, and let consistency do what consistency always does. It adds up.